
There are many map areas to explore, each with its own minor quests and one major quest. In-Area quests are linear – you usually must finish a quest or quests before you can continue to the next region. Often the game uses barriers (gates, thorns, rocks, downed trees, etc.) to prevent that access until it’s time.

When you finish the major quest you’ll have the option to progress to the next area, but once you do, the old area will close in 24 hours and you will not be able to return. Suggest you thoroughly explore each area and gather any critical resources you may need before moving on.

Each area also has “Challenges” (accessed via an icon in the lower left corner of the screen) where you can earn rewards for finding and gathering specific items (loot, merchant chests, resources). A bonus is that each quest also has a blue and white arrow that points to where the items are located on the area map.


Area Quests
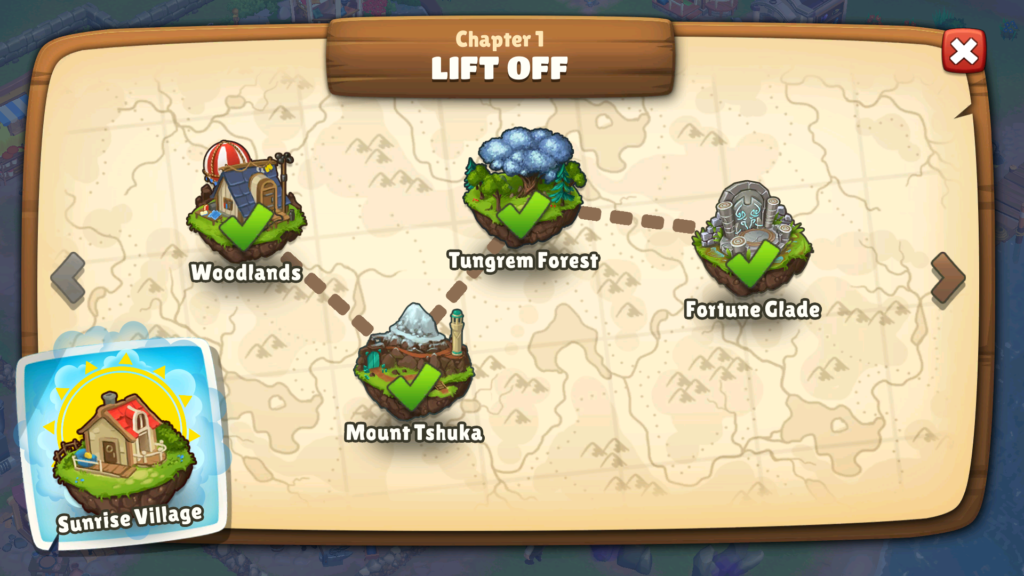
| Chapter 1 Lift Off | Chapter 2 Ancestor’s Calling | Chapter 3 Spirits Within | Chapter 4 Eternal Tides | Chapter 5 Desert Solace | Chapter 6 Steeled Hearts | Chapter 7 Everlasting Embers | Chapter 8 Breath of Wind | Chapter 9 Lost Kin |
| Woodlands | Ruins of Villaris | Riverwood Camp | Willow’s Green | Het’kels Museum | Volcano Island | Summertide Forest | Woodlands (Again) | Willy’s Mansion |
| Mount Tshuka | Ancient Forge | Dorada Forest | Mystic Lake | Desert Town | Magma Basin | Azmar’s Nest | Underwater Valley | Haunted Forest |
| Tungrem Forest | Cornflower Meadow | Rhox Hollow | South Yuma | Shay Desert | Mycena Grotto | Embers Garden | Tornado Cliffs | Gloomy Swamps |
| Fortune Glade | Secret Library | Crimms Thicket | North Yuma | Temple of Ard | Wisdom Growth | Abandoned Mine | Air Peaks | Gearforge Village |
| Pandora’s Grove | Vails Gate | Secret Chambers | Crystal Cave | Mount Shamaira | Floating Temples | Waterfall Whispers | ||
| Cloud Realm |
Timed Stage Areas
Note: Sometimes the Hint Arrow may be a bit off the mark in these areas. If you keep getting “Not Available” when selecting a quest, try moving your character on the map to the area at or near the last quest, then tap the new, desired quest – it should then show the correct hint location(s).
Woodlands Quests
- Clear boulder
- Clear 1st gate by cutting vines
- Clear 2nd gate
- Clear more vines
- Rescue Albert the Inventor using dynamite
- Clear 3rd gate
- Find pond
- Collect 6 fire flowers
- Clear broken gate in Village
- Retrieve toolbox from Village near deer statue
- Clear 4th gate
- Repair Torch Tower (3 stages: 1st-20 twigs, 10 quartz, 10 wood; 2nd-30 stones, 10 clay, 15 quartz; 3rd-6 softwood, 2 plywood, 15 wood)
- Create 2 balloon fuel (each: 3 fire flowers, 5 twigs)
- Clear 5th gate
- Gather mushrooms then create soup
- Obtain fabric (4 spider silk)
- Manufacture one screw for balloon, then finish balloon (4 fabric, 5 screws, 2 gravel)
Back to top of Area Quests List
Mount Tshuka Quests
- Travel the Summit Path
- Fix the Stove – optional – creates water from ice in 8 minutes; 1 stage: 3 fire + 10 wood
- Travel Path to Summit continues
- Repair the Collapsed Tunnel – 1 stage: 25 wood, 25 twigs, 4 gravel
- Repair the Frozen Gate – 1 stage: 4 planks, 1 screw, 25 quartz
- Travel Near the Summit
- Produce 1 brick in Village
- Repair the White Tower – 2 stages: 1st=25 stones, 2 mortar, 4 plywood, 2nd=3 planks, 1 brick, 2 screws
Back to top of Area Quests List
Tungrem Forest Quests
- Rushing Water – Clear 2 thorny bushes and then Find the River
- Clear the Fallen Tree
- Erin’s Path – Find the Old Campsite
- Camping Out – Find 2 spider silk (“fabric” – each costs 12 energy); Repair campsite: 1 stage: 24 hardwood, 4 screws, 2 fabric)
- Find the Gate – Clear 5 clay (any size); Find the Ancient Gate
- Flax for Ropes – Gather 12 flax plants (each plant costs 5 energy)
- Leverage – Produce two ropes at Campsite (6 flax per rope, 30 minutes each)
- Open/Repair the Gate – 1 stage: 2 ropes, 2 bricks, 5 iron bars
- Sacred Places – Discover the Sacred Spring
- Discover and collect 8 Bane Flowers (each plant costs 5 energy)

- Erin’s Abode – Find Erin’s House
- Restore the Campfire (optional) – 2 stages: 1st=10 softwood, 10 stones, 5 fire; 2nd=10 wood, 5 water, 2 sand (create mushroom soup [25 energy] or berry syrup [20 energy])
- Produce two potions at Erin’s Home (using 4 Bane Flowers per potion, 15 minutes each)
- Travel ( requires much energy due to many obstructions) to the Sacred Spring – 2 stages: 1st=Apply the two potions to the Sacred Spring; 2nd= Apply the Pure Water Vial (see quest below)
- Purity – Find the Water Statue, Extract the Pure Water Vial, Restore the Sacred Spring
- Cutting Edge – Mine two big gold ores; Produce Golden Shears at Erin’s Home (requires 2 big gold and 3 hammers, 90 minutes)
- Whispering Tree – Produce a Rope Ladder (produce four more ropes at the Campsite (6 flax per rope, 30 minutes each)) plus 5 wood then create the ladder at Erin’s Home (1 hour); then climb the ladder and use the shears to Cut a Branch (Mystical Wood) from Whispering Tree
Back to top of Area Quests List
Fortune Glade Quests
- Find the Workbench
- Repair the Workbench – Find the Toolbox and repair the workbench: 1 stage: 2 planks and 1 toolbox
- Craft the Compass Needle (on the workbench): uses 1 saw and the Mystical Wood Branch (1 minute)
- Craft the Compass (on the workbench): uses 1 hammer, the compass needle, and the broken compass (10 minutes)
- Find the Oracle’s Altar
- Restore the Campfire (optional) – 2 stages: 1st=5 stones, 10 twigs; 2nd=5 softwood, 2 fire (create mushroom soup [25 energy] or berry syrup [20 energy])
- Rescue Plan – Rescue the trapped deer: Gather 3 large leaves (cost 10 energy each)
- Save the Deer – Craft a mat on the workbench (from 3 leaves and 5 grass, 30 minutes) then lay down the leaf mat along with 10 sand
- Broken Leg – Treat the deer’s leg: gather another large leaf, craft a bandage on the workbench (1 leaf plus 1 water, 5 minutes), and heal the deer (1 bandage and 1 hay bale)
- Restore the Altar – 3 stages: 1st=10 fire; 2nd=find 1 altar piece, 1 trowel, 2 mortar; 3rd=1 altar piece, 4 cement, 2 bricks
- Activate the Altar – Place the repaired compass on the Altar
Back to top of Area Quests List
Ruins of Villaris Quests
- Travel to the Ruins’ Entrance
- Repair Firepit (optional, produces two fires every hour) – 1 stage: 5 stones, 3 wood
- Light lanterns (multiple lanterns, optional, receive experience) – requires 1 fire each
- Find Bat’s Home – Get Rid of Vines and Repair – 3 stages: 1st=3 saws; 2nd=5 clay, 20 twigs, 3 planks; 3rd=8 wild forest fruits (costs 20 energy to gather one cluster of 2 fruits); note: many, many trees as obstacles on the way to the bats’ home
- Follow the Path through the arch
- Clear two large boulders (actually ruined structures, costs 30 energy each)
- Find a Way over the Ditch (go north to bridge)
- Repair the Bridge – find two ivy vines (on a tree); Repair – 2 stages: 1st=2 ivy vines; 2nd=2 planks
- The Main Hall – explore the ruins; repair the campfire (optional) – 1 stage: 5 wood, 1 fire (create mushroom soup [25 energy] or berry syrup [20 energy])
- Light 2 lanterns (optional)
- Missing Mechanism – find the mechanism
- Earn Bird’s Trust (to get two marbles) – 2 stages: 1st=feed 10 peas; 2nd=give 10 eggs
- Find the Golden Key
- Open the Chest – 2 stages: 1st=2 marbles; 2nd=golden key
Back to top of Area Quests List
Ancient Forge Quests
- Suspicion – Clear 3 huge thorns (each costs 20 energy)
- Help the Forest – Remove three dead trees (each costs 32 energy), plant three trees (pine cones), remove 5 thorns
- Restore the Campfire (optional) – 2 stages: 1st=5 stones, 10 twigs; 2nd=5 softwood, 2 fire (create mushroom soup [25 energy] or berry syrup [20 energy])
- Light lanterns (optional, receive 100 experience) – requires 1 fire each
- Passage – Find the passage (bridge) to the Forge
- Find the Forge Building
- Repair the Forge’s Residential Building: 3 stages: 1st=75 wood, 2 screws, 120 stones; 2nd=4 plywood, 2 mortar, 5 sand; 3rd=2 pipes, 3 glass, 2 bricks
- Repair the Waterwheel: 2 stages: 1st=5 fire, 25 clay, 3 planks; 2nd=2 screws, 4 butter
- Cleaning Up – remove 5 thorn bushes
Back to top of Area Quests List
Cornflower Meadow Quests
- Find the Vault – clear a three-vines barrier and find the Vault
- The Plan – find a place to lure the guard away
- The Decoy – Find 5 cloth; Build the Decoy (scarecrow): 3 stages: 1st= 2 planks, 10 grass; 2nd=5 cloth (in white chests), 5 hay bales; 3rd=1 pumpkin
- Find the Vault – Again
- Adrianne Flower – Find 4 red-orange flowers (2 plants, 2 blossoms per plant)

- A Place to Cook – Restore the Campfire (required) – 1 stage: 5 wood, 3 fire
- Make Pain Reliever in Campfire – 4 blossoms, 1 water, 5 minutes; gives 20 energy
- A Favor in Return – Find the Second Vault
- Repair the Vault – 2 stages: 1st=5 gravel, 5 mortar, 150 twigs; 2nd=5 cement, 2 bricks, 2 hammers
- Go to the Old Chapel
- Light 2 lanterns (optional, receive 100 experience) – requires 1 fire each
- Glass Window – Find 3 stained glass pieces; repair the window
- X Marks the Way – Break the floor tile (costs 6 energy)
Back to top of Area Quests List
Secret Library Quests
Note: The Secret Library has limited, sometimes unrecognizable, resources in it (books, bookcases, debris, etc.) so suggest stocking up on any resources you may be low in (quartz, clay, iron ore, etc.) in the Cornflower Meadow or the Resource Factory before entering.
- Explore the Library; note: you can tap on large statues (dragon skulls, bears, deer, etc.) and fireplaces for rewards.
- Light the Lantern (costs 1 fire)
- Find a Way Through the Labyrinth (it’s a-mazing-ly far)
- Find the Golden Key and Open the Chest
- Light the Lantern (requires 1 fire)
- Go Further into the Labyrinth (past the lantern)
- The Ceiling – Fix three pillars; 1st pillar: 2 stages: 1st=5 cement, 5 gravel, 20 wood; 2nd: 80 twigs, 5 mortar; 2nd pillar: 2 stages: 1st=15 stones, 15 quartz, 25 clay; 2nd=2 cement, 1 trowel, 1 brick; 3rd pillar: 2 stages: 1st=10 clay, 1 cement, 10 sand; 2nd=2 mortar, 1 plank, 1 brick
- Navigate the Second Labyrinth
- Repair the Keyhole (and open the 2nd Chest) – 2 stages: 1st=1 hammer; 2nd=find and use 2nd golden key
- Light the Path – Light another lantern
- Blockage – Remove multiple fiery vines (requires fire) and thorny vines
- Find the Round Marbles (for the locked 3rd chest); use 1 hammer to retrieve 2 marbles from the statue
- Restore the Campfire (optional) – 2 stages: 1st=5 stones, 10 twigs; 2nd=5 softwood, 2 fire (create mushroom soup [25 energy] or berry syrup [20 energy])
- Open Sesame – 2 stages: 1st=Use the marbles on the 3rd chest; 2nd=Find and use the 3rd gold key on chest
- Last Light – Light another lantern (1 fire)
- More Bookshelves – Find a way through more of the labyrinth
- Follow the Thief – Follow a mouse (more labyrinth)
- Lure the Mouse – 2 stages: 1st=1 cheese; 2nd=1 more cheese; get the shred from the mouse hole
- The Manuscript – Put the various shreds together at the Desk; 3 stages: 1st=1 saw; 2nd=the first 3 shreds; 3rd=the remaining 3 shreds
- The Bookshelf – Get credit for collecting 4 blue books (receive 10 gems)
- The Heirlooms – Go back to the Village and speak with Grandpa: get directed to a new area: Riverwood Camp
Back to top of Area Quests List
Riverwood Camp Quests
- Meet Glen (Chuck’s father)
- The Crash – Find the crash site
- Rubble – Clear the rubble (costs 14 energy) to get the (broken) Wood Elemental Crystal
- Mystery Spot – Find the Spot
- Light – Assemble the Stone Formation; 2 stages: 1st=10 twigs, 10 grass; 2nd=3 fabric (find 3 nearby spiderwebs, costs 12 energy each)
- Woodcarver’s Bench – Repair the workbench: 3 planks, 10 twigs, 3 glue
- Find the Carving Tools (4 red chests)
- Encounter the Four Animals (rabbit, fox, deer and bear) – Spin the wheel for each animal to reach the required points (each spin costs 10 energy); for example: each animal requires 100 points and the spins range from 10 to 60 points, so 2 to 10 spins (20 to 100 energy total) are needed
- Repair the Campfire – 2 stages: 1st=5 stones, 10 twigs; 2nd=5 wood, 5 fire
- Glen’s Lunch – Gather 4 mushrooms and create mushroom soup
- Gather 5 pinecones (from 5 dead trees near the Mystery Spot, costs 32 energy each)
- Plant the Pinecones in the Sapling Grove
- Carve the 4 Figurines on the Workbench (each takes 1 hour)
- Find the Summoning Circle
- Clear the Summoning Circle of 5 vines (6 energy each) and place the 4 figurines
Back to top of Area Quests List
Dorada Forest Quests
- The Voice – Find out who is nearby
- Trapped Explorer (Jane) – Clear multiple large thorns (20 energy each plus 2 fire)
- Find Jane’s Camp
- Gather 4 Vines (from dead trees, 10 energy each) and 4 Spiderwebs (20 energy each) to make honey bee nets
- Make 4 nets (1 vine and 1 web, 10 minutes each)
- Catch 4 groups of honey bees (1 net and 1 glass jar each)
- Fix the Beehive and then make 3 honey (1 water and 1 sugar, 10 minutes each)
- Find the Bear and Observe it – use the honey to spin the wheel to reach 100 points (you will probably need to make additional honey in Jane’s camp)
- Onward – follow the trail past the dead tree
- Cave of Wonders – Clear three large boulders (90, 90, and 100 energy); this may be a good time to use dynamite
Back to top of Area Quests List
Rhox Hollow Quests
- Root of the Problem – explore the cave to find the tree roots; collect the blue mineral rocks along the way (need 18 minimum)
- Where is the Water – continue on toward the waterfall
- Camping – reactivate the campfire
- Mineral Solution – use the campfire to make three mineral solutions using one blue mineral and one water each to clear the purple vines (10 min); Note: the total # of solutions needed for Rhox Hollow = 18, so continue to collect the minerals and make solutions as you go/wait
- Vines Begone – use three solutions on three vines to the west to see the baby foxes
- Pups’ Dilemma – continue exploring to find the mother fox (on the other side of the waterfall)
- Water Channel – redirect the water into the cavern; 2 stages: 1st=6 saws, 4 beams, 50 hardwood; 2nd=4 screws, 8 trowels, 6 mortar
- Build the Bridge (for the mother fox) – 1 stage: 8 planks, 6 saws, 6 screws
- Fungus Among Us – collect 6 green fungi at 12 energy each (found beyond more purple thorns which require 10 additional mineral solutions)
- Collect 10 moss from mossy rocks (12-30 energy each)
- Build a fox burrow – 3 stages: 1st=10 twigs; 2nd=10 grass; 3rd=10 moss (remove another purple vine with 5 mineral solutions to reach more mossy rocks)
- The Second Essence – use the energy spinner (100 points) to get the essence from mother fox
- Explore to find the cave’s exit
Back to top of Area Quests List
Crimms Thicket Quests
- Follow the Path to meet the Twins
- Follow the Twins (note: you can tap on the giant red, round mushrooms for rewards)
- Broken Tree House – remove the giant vines then repair the structure; 3 stages: 1st=5 beams, 1 flooring, 5 chains; 2nd=3 fabric rolls, 40 cotton, 2 modular walls; 3rd=1 banner (3 pieces, repaired), 1 string lights, 1 flag (explore to find these)
- Build the Workbench – 1 stage: 6 saws, 10 plywood, 2 sheet metal
- Repair the Banner – 3 banner pieces, 1 glue, 3 yarn
- Follow the Twins (again)
- Uninvited Guests (to the Tea Party) – destroy two huge vines (20 energy each)
- Repair the 3 Tea Party chairs: Benny’s Armchair=8 screws, 4 fabric rolls, 2 threads; Penny’s Armchair=6 hay bales, 4 thread, 5 glue; Wooden Chair=5 screws, 5 plywood, 4 saws
- Find 5 teacups, and then 1 teapot (find 4 pieces then repair on workbench using 2 glue, 10 minutes)
- Gather mushrooms for Greta to receive 5 tea leaves – collect 5 blue and 5 red mushrooms (10 energy each)
- Make 5 teabags on the workbench (1 portion of tea, 1 paper, and 1 yarn each, 10 minutes per bag)
- Provide sweets for the party: 1 pumpkin cheesecake, 2 ice cream, and 3 donuts
- Find the mouse and cat plushy toys
- Repair the toys on the workbench using 2 yarn balls each (10 minutes each)
- Follow the blue rabbit – use the spinner (requires 100 points) to get the 3rd animal essence
Back to top of Area Quests List
Pandora’s Grove Quests
- Hungry – find and repair the fireplace (5 wood, 3 fire, 15 stones); you can tap on the huge round red mushrooms and single-lantern trees for rewards
- Find 2 fruit (10 energy each) to make fruit soup (10 minutes, gives 25 energy)
- Get the 4th essence from the deer (spinner: 100 points)
- Light the oracle’s beacon – 2 stages: 1st=10 twigs, 10 grass; 2nd=3 fabric (find spider webs nearby)
- Find the wisps; collect mineral rocks as you go (need at least 11)
- Repair the wisp’s house – 2 stages: 1st=8 planks, 8 cement, 3 glass jars; 2nd=10 glowing flowers (6 energy each), 4 yarn, 1 bed
- Find the next wisp tree and then search for another wisp to reunite them (requires 1 bed)
- Explore to find the Temple entrance (blocked by impenetrable giant vines)
- Without Energy – Find another wisp and destroy the surrounding stony vines with mineral solutions (11 required, made in campfire) to remove the entrance vines
- Remove many vines to clear the temple area including a giant stony vine (requires another 10 mineral solutions)
- Repair the broken stone of the temple (no cost) then add the Wood Crystal
- Return to the Village and insert the crystal in one of the rune stones
Back to top of Area Quests List
Willow’s Green Quests
- Find Jenny’s family home and meet Julius, her brother
- Repair the stove (50 twigs, 20 wood, 5 sheet metal), collect 4 flowers (uses 9 energy each) and make some Mallow tea
- Missing sheep – repair the broken fence (6 beams, 3 screws, 8 hammers) then explore to find the sheep
- Way to sheep blocked by bear – use spinner (requires 200 points) using fish after finding pond and catching fish using 10 corn and 1 cheese for each one (10 minutes each)
- Head to the river and repair the broken bridge – 3 stages: 1st=3 pipes, 2 beams; 2nd=2 beams, 2 hammers; 3rd=2 mortar, 4 screws
- Lure the sheep back to their yard: make a path for them (bypassing the bear), remove the large stone on the alternate path (12 energy), and place a total of 10 sheep feed and 125 twigs in the five feeders on the ground
- Find the broken storage shack and then search for the first two lost items (globe and books)
- Search for the second set of two lost items: the goblet, and must pass another bear using fish for the 200 points spinner to get the suitcases
- Replace the shack – 3 stages: 1st=2 modular walls, 3 pipes, 10 saws; 2nd=(lost items) 1 globe, 1 books, 1 suitcases; 3rd=1 goblet, 3 windows, 6 tiles
Back to top of Area Quests List
Mystic Lake Quests
- Begin exploring the jungle to find the Oracle’s Beacon
- Light the beacon – 2 stages: 1st=10 twigs, 10 grass; 2nd=3 fabric (find spider webs)
- Explore to find the Water Guardian (Ara)
- Troubled Lake – find the reason for the murky water
- Collect 30 minerals to make the solutions to kill the giant vines
- Explore to find Ara’s campsite
- Repair the campfire – 3 stages: 1st=2 cans, 1 glass jar; 2nd=1 pot lid (find it across the river), 5 water, 3 hammers; 3rd=1 ladle (east side of the lake), 5 fire, 4 butter
- Repair the fireplace – 3 stages: 1st=2 sheet metal, 6 bricks, 10 sand; 2nd=7 mortar, 5 trowels; 3rd=5 fire, 30 twigs
- Create 30 mineral solutions required to kill the three vines (10 per) in the fireplace (10 minutes each solution)
- Find the 5 turtles for the gemstones on their shells (120-point spinners for each, 15 energy per spin)
- Find the stone grinder to crush the gemstones; requires 9 mineral solutions to pass 3 stony vines
- Repair the grinder – 3 stages: 1st=80 stones, 8 beams, 6 pipes; 2nd=10 iron bars, 5 glue, 5 hammers; 3rd=8 trowels, 5 mortar, 1 stool
- Grind gems (10 minutes each, no cost)
- Find 6 Night Flowers then craft 3 Purifier potions in the fireplace
- Restore the lake – 3 stages: 1st=1 purifier, 5 water, 1 gem; 2nd=1 purifier, 5 water, 1 gem; 3rd=1 purifier, 15 sand, 3 gems
Back to top of Area Quests List
South Yuma Quests
- Help Wanted – Explore to find out who needs help; note: you can tap on the surfboards for rewards
- Stuck in the Sand – Find 9 shovels (requires 10 energy each) to dig out the buried person
- Dig out Albert – 3 stages: 1st=2 shovels, 7 sand; 2nd=2 shovels, 10 trowels; 3rd=5 shovels, 10 hammers
- Find Sally, the seashell seller on the east coast
- Collect 60 seashells for Sally (30 piles of 2 shells each, requires 20 energy per pile) [definitely in the running for the most tedious quest in the game]
- Take your shells to Sally and fill up her 3 baskets with 20 sea shells each
- Messages – find 4 bottles with messages inside
- Build up the sandbar water crossing to the nearby island – 3 stages: 1st=15 sand, 20 twigs; 2nd=20 gravel, 25 grass; 3rd=5 moss (from mossy rocks, requires 10-30 energy per rock), 50 stones, 7 mortar
- Search for bottle message sender (fisherman)
- Find Albert and ask about making magnets to scare off 3 sharks
- Repair the campfire – 2 stages: 1st=5 stones, 10 twigs; 2nd=5 softwood, 2 fire
- Fix bridge to 3rd island – 3 stages: 1st=3 pipes, 2 beams; 2nd=2 metal beams, 2 hammers; 3rd=2 mortar, 4 screws
- Find 35 portions of magnite ore on 3rd island (20 energy gets 5 ore)
- Build the workstation – 3 stages: 1st=9 plywood, 10 magnite, 5 sheet metal; 2nd=10 magnite, 15 saws, 20 trowels; 3rd=15 magnite, 8 paper, 3 metal beams
- Make shark repellent – requires 2 iron bars, 3 wool, and 10 minutes each (task requires 3, but several more will be needed for the spinners)
- Scare away the 3 sharks using magnetic repellents to spin the spinners
- Repair the bridge leading to North Yuma – 3 stages: 1st=3 pipes, 2 beams; 2nd=2 metal beams, 2 hammers; 3rd=2 mortar, 4 screws
Back to top of Area Quests List
North Yuma Quests
- Going On – Explore to find out who needs help
- Help the Crabber find his hut in the fog; note: you can tap on the lantern trees for rewards
- Fix the ruined hut – 3 stages: 1st=5 planks, 7 glue, 4 modular walls; 2nd=4 tiles, 2 windows, 2 flooring; 3rd=1 bed, 2 stools, 2 quilts
- Find 4 crab traps; note: collect all of the magnite ore and flax as you go
- Fix the 4 sets of crab traps – 3 stages for each set of traps: 1st=3 planks, 3 screws, 2 nets (made with ropes in the hut from flax); 2nd=3 beams, 4 pipes, 2 nets; 3rd=3 cans, 50 stones, 2 nets
- Find and repair the workbench to make more magnets to get rid of the shark – 3 stages: 1st=9 plywood, 10 magnite, 5 sheet metal; 2nd=10 magnite, 15 saws, 20 trowels; 3rd=15 magnite, 8 paper, 3 metal beams
- Find and repair the campfire – 2 stages: 1st=5 stones, 10 twigs; 2nd=5 softwood, 2 fire
- Repair the suspension bridge – 3 stages: 1st=1 strong ivy, 5 glue, 10 bamboo wood; 2nd=5 chains, 2 sand, 10 bamboo wood; 3rd=1 strong ivy, 3 flooring, 10 bamboo wood
- Find 3 boat parts, and then repair the fishing boat – 3 stages: 1st=5 beams, 7 pipes, 5 saws; 2nd=2 sheet metal, 10 hammers, 8 mortar; 3rd=5 windows, 3 fabric rolls, 3 boat parts
Back to top of Area Quests List
Vails Gate Quests
- Search the island for the waterfall
- Follow the footprints through the waterfall to Jane’s flooded camp
- Find Jane and help her free the stranded shark – 2 stages: 1st=15 trowels, 10 hammers, 8 pipes; 2nd=5 metal beams, 4 chains, 15 saws
- Find the bird of paradise (looks like a toucan) and build an observation deck on its tree – 3 stages: 1st=5 beams, 7 screws, 8 plywood; 2nd=1 binoculars, 1 bird whistle, 5 mortar; 3rd=5 bird feed (see #7 below), 4 flooring, 3 modular walls
- Make binoculars in Jane’s camp – 4 glue, 2 glass, 3 sheet metal
- Make bird whistle in Jane’s camp – 2 beams, 10 saws, 3 yarn
- Collect 10 tropical fruits to make 5 bird feed portions in Jane’s camp – 2 fruits, 5 chicken feed, 15 corn, and 10 minutes per portion
- Find the forest spirits (wisps) and then find 5 dying corals
- Collect 10 lazuli crystals from turtles (spinners, 120 points needed, uses 15 energy per spin)
- Repair the stone grinder – 3 stages: 1st=80 stones, 8 beams, 6 pipes; 2nd=10 iron bars, 5 glue, 5 hammers; 3rd=8 trowels, 5 mortar, 1 stool
- Crush the 10 gems (10 minutes each)
- Restore the 5 corals – 2 stages each: 1st=1 crushed gem, 2 mortar, 3 water; 2nd=1 crushed gem, 2 sand, 2 glass
- Find the pool of magic then follow the wisp to its home
- Gather 10 glowing flowers and find 4 buried lanterns
- Repair the wisp’s house – 3 stages: 1st=2 lanterns, 5 flowers, 4 beams; 2nd=2 lanterns, 5 glowing flowers, 3 glass jars; 3rd=2 strong ivy (find the tree), 5 metal beams, 5 modular walls
- Restore the 4 lanterns in the repaired wisp house – 1 fire, 3 pipes, 1 glass jar each
- Place the lanterns on the pedestals at the pool – 2 stages each lantern: 1st= 1 lantern, 3 glass jars, 2 mortar; 2nd=1 glowing flower, 15 gravel, 20 twigs
- Disperse the sharks using a spinner (100 points, 10 energy per spin) and retrieve the Water Elemental Crystal
Back to top of Area Quests List
Het’Kels Museum Quests
- Find the museum’s curator, Cornelius; notes: you can tap on some display cases for rewards, and the structure and obstacles are similar to those in the Secret Library
- Repair 3 Vitrine artifact display cases – case #1: 2 stages: 1st=4 glass, 6 pipes, 3 glue; 2nd=1 flooring, 4 mortar; case #2: 2 stages: 1st=2 window glass, 3 pipes, 3 glue; 2nd=1 flooring, 4 mortar; case #3: 2 stages: 1st= 2 window glass, 3 pipes, 3 glue; 2nd=2 trowels, 4 mortar
- Repair 3 Vase display cases – each has 2 stages: 1st=4 glass, 6 pipes, 3 glue; 2nd=1 flooring, 4 mortar
- Find 3 damaged artifacts in the library
- Find and restore the workbench using 4 screws and 5 planks
- Find and collect 6 archaeological tool sets (requires 12 energy each to pick them up)
- Restore the 3 damaged artifacts on the workbench using the archaeological tools (10 minutes each)
- Find the 3 missing vases and then dig them out of the sand – 3 trowels and 2 hammers for each
- Place the restored artifacts and vases in their display cases
- Search for the library area of the museum
- Lure 5 mice away with spinners (each requires 100 points) using cheese as bait, collecting one book per mousy encounter
- Collect 10 amber to make varnish for books (and you’ll need 6 more for later potions)
- Make 5 varnish on the workbench – 2 amber, 1 fire, 1 water, and 10 minutes each
- Assemble the bookshelf using the books and the varnish
- Search for the ancient scroll; find the Twins
- Collect 5 pillows from sofas (actually need 8), and produce two new quilts to make the pillow fort
- Produce several new snacks: 3 donuts, 3 waffles, and 3 cheesecakes
- Build the fort – 3 stages: 1st=4 pillows, 5 fabric, 3 flooring; 2nd=2 quilts, 4 pillows, 3 beams; 3rd=3 waffles, 3 cheesecakes, 3 donuts
- Get the ancient scroll from the Twins
- Find the curator and then make 6 amber potions on the workbench (10 minutes each)
- Open the Shrine doors using the potions – 2 stages: 1st=2 potions; 2nd=3 saws, 4 potions
- Find 2 gold keys and then use them and the ancient scroll on the statue to get the map
Back to top of Area Quests List
Desert Town (Ta’Kardeh) Quests
- Explore to find the town and encounter the thirsty camel; Note: tap on some vendor stalls for rewards
- Find 5 prickly pears (collect two pears from each cactus using 10 energy)
- Revive the camel using 5 prickly pears, 3 sheep feed, and 10 water
- In town repair the water well – 3 stages: 1st=4 bricks, 3 mortar, 6 gravel; 2nd=5 planks, 4 glue, 4 pipes; 3rd=2 beams, 5 stones, 3 tiles
- Repair the campfire – 2 stages: 1st=5 stones, 10 twigs; 2nd=5 softwood, 2 fire
- Explore the town to find the three broken towers
- Repair the towers, each one has 3 stages: 1st=6 planks, 4 mortar, 3 glue; 2nd=4 bricks, 4 screws, 2 planks; 3rd=2 fabric, 5 stones, 5 clay
- Rebuild 3 town wall sections – each one has 3 stages: Small Wall: 1st=2 bricks, 2 beams, 2 glue; 2nd=2 bricks, 3 cement, 1 hammer; 3rd=3 pipes, 2 planks, 2 trowels. Middle Wall: 1st=4 bricks, 2 beams, 2 cement; 2nd=2 sheet metal, 3 cement, 1 hammer; 3rd=3 pipes, 2 planks, 5 trowels. Third Wall: 1st=4 bricks, 2 beams, 2 cement; 2nd=1 modular wall, 3 cement, 3 hammers; 3rd=3 pipes, 2 planks, 5 trowels
- Find the Lin (corn) fields and harvest 10 corn (requires 20 energy each per 2 ears)
- Fill the emergency food supplies box – 3 stages: 1st=10 corn, 15 strawberries, 20 eggs; 2nd=20 peas, 20 wheat, 2 buttermilk; 3rd=3 canned tomatoes, 15 cucumbers, 10 truffles
- Remove the blocking large rocks to find three damaged houses
- Repair the houses and the camel stable – House 1: 3 stages: 1st=1 window, 4 planks, 2 hammers; 2nd=1 stool, 4 bricks, 4 trowels; 3rd=3 fabric, 2 beams, 4 mortar. House 2: 3 stages: 1st=1 window, 4 planks, 5 mortar; 2nd=2 glue, 6 bricks, 1 desk; 3rd=1 fabric, 2 trowels, 4 beams. Stable: 3 stages: 1st=4 bricks, 5 planks, 2 hammers; 2nd=4 beams, 4 mortar, 1 trowel; 3rd=3 sheep feed, 4 hay bales, 2 saws
- Find Rick the camel’s 3 pieces of riding gear outside the city walls: saddle, reins, and backpack
- Saddle Rick the camel – 3 stages: 1st=1 saddle, 3 water, 3 sheep feed; 2nd=1 reins, 1 quilt, 2 hay bales; 3rd=1 backpack, 3 sheep feed, 10 peas
- Find the three camels and use water buckets in the spinners to tame them (100 points needed for each)
- Find another camel – use water in spinner to successfully tame it
- Prepare the new camel – 3 stages: 1st=5 water, 2 canned tomatoes, 3 sheep feed; 2nd=1 quilt, 1 fruit preserve, 2 hay bales; 3rd=1 creamed corn, 2 cheesecakes, 10 peas
- Get ready for the desert journey: find the tent, scarf, and sleeping bag
- Find the Weaver/Carpet Seller then fix his house – 3 stages: 1st=2 windows, 4 bricks, 2 trowels; 2nd=4 pipes, 4 planks, 4 mortar; 3rd=1 stool, 7 yarn, 2 fabric
- Use the sewing bench to repair the gear: the scarf requires 2 fabric and 2 yarn; the tent needs 5 pipes and 3 fabric; the sleeping bag requires 4 fabric and 20 wool
- Prepare Rick for a desert journey – 3 stages: 1 sleeping bag, 4 Lin corn, 3 water; 2nd=1 tent, 1 quilt, 2 canned tomatoes; 3rd=1 scarf, 1 creamed corn, 1 map
- Repair the three lighthouses/beacons, each has 3 stages – City: 1st=3 bricks, 3 mortar, 3 glue; 2nd=3 saws, 4 beams, 3 trowels; 3rd=4 glass, 3 fire, 4 planks. Northern: 3 bricks, 3 mortar, 3 trowels; 2nd=3 glue, 4 beams, 3 saws; 3rd=4 glass, 3 fire, 4 planks. Southern: 1st=3 bricks, 3 mortar, 4 beams; 2nd=3 glue, 3 trowels, 3 bricks; 3rd=4 glass, 3 fire, 4 planks
Back to top of Area Quests List
Shay Desert Quests
- Explore to find the fridge and repair it – 3 stages: 1st=2 sheet metal, 3 trowels, 2 planks; 2nd=5 screws, 2 tiles, 2 window glass; 3rd=3 pipes, 2 bricks, 2 yarn
- Fix the bathtub – 3 stages: 1st=2 mortar, 3 glue, 5 screws; 2nd=2 tiles, 2 hammers, 1 quilt; 3rd=2 pipes, 5 planks, 2 mortar
- Fix the water dispenser – 3 stages: 1st=2 sand, 5 gravel, 5 screws; 2nd=2 planks, 2 hammers, 1 metal beam; 3rd=2 pipes, 3 glue, 5 paper
- Fix the fire hydrant – 3 stages: 1st=2 sheet metal, 3 trowels, 3 glue; 2nd=3 tiles, 1 hammer, 1 metal beam; 3rd=3 sand, 2 saws, 3 screws
- Fix the vending machine – 3 stages: 1st=1 sheet metal, 3 trowels, 2 glass; 2nd=4 tiles, 2 hammers, 1 modular wall; 3rd=3 pipes, 5 planks, 2 mortar
- Fix the Oracle’s beacon – 2 stages: 1st=10 twigs, 10 grass; 2nd=3 fabric (spider webs)
- Restore the campfire – 2 stages: 1st=5 stones, 10 twigs; 2nd=5 softwood, 2 fire
- Restore the oasis – 3 stages: 1st=1 metal beam, 3 mortar, 2 trowels; 2nd=1 hammer, 2 tiles, 2 planks; 3rd=2 shovels (found nearby in the desert), 2 saws, 2 pipes
- Find 5 palm trees (requires 36 energy each to get a coconut) and then plant the coconuts in the oasis
- Build a well – 3 stages: 1st=2 sheet metal, 3 trowels, 5 bricks; 2nd=5 tiles, 2 mortar, 1 pipe; 3rd=2 screws, 5 planks, 3 bricks
- Find 4 lost camels and use water on spinners (100 points required) to save them
- Speak again with the Oracle and search for the hidden temple
- Gather 7 ropes to rebuild the bridge – 2 stages: 1st=3 ropes, 5 planks, 5 bricks; 2nd=2 mortar, 7 plywood, 4 ropes
- Find and restore the campfire – 2 stages: 1st=1 sheet metal, 6 bricks, 10 sand; 2nd=5 fire, 30 twigs, 5 mortar
- Collect amber from plants and make 12 potions in the campfire (1 amber, 1 fire, 1 water, 10 minutes each)
- Remove the vines blocking the temple doorway – 3 stages: 1st=5 amber potions; 2nd=4 amber potions; 3rd=3 amber potions
- Build a ladder to get the amulet from the pillar – 3 stages: 1st=5 screws, 2 planks, 1 brick; 2nd=2 glue, 2 mortar, 1 pipe; 3rd=1 beam, 1 saw, 8 plywood
Back to top of Area Quests List
Secret Chambers Quests

- Find the four wheels for the mosaic (requires 12 energy each); Note: tap on some large urns for rewards
- Apply the wheels to the mosaic, turning the squares 2-3 times each to make the picture (faces to the right); each turn requires 10 energy
- Restore the campfire – 2 stages: 1st=5 stones, 10 twigs; 2nd=5 softwood, 2 fire
- Repair the workbench – 3 stages: 1st=6 saws, 10 plywood, 2 sheet metal; possible bug in game: 2nd and 3rd stages not needed to complete quest
- Build a way through the sand waterfall – 3 stages: 1st=2 beams, 3 trowels, 4 screws; 2nd=3 plywood, 1 modular wall, 1 sheet metal; 3rd=3 pipes, 5 planks, 2 mortar
- Cross the chasm using sand (about 10-12 portions) to reach the chest and recover the Cat Eye
- Activate the statue – 3 stages: 1st=2 amber potions; 2nd=1 guardian’s rod; 3rd=1 Cat Eye
- Follow the Guardian (tap on the cat statues for rewards) to the Snake Charmer’s Chamber then use the spinner (100 points required, 10 energy per spin) to get past the snake
- Follow the wisp to its tree, then find 4 other wisps; use spinners (100 points, 1 pungi needed per spin) to save them from the snakes (make pungis at the wisp tree: 2 planks, 1 glue, 1 yarn, 10 minutes each); collect 10 scarab jewels from 5 snakes
- Place the scarabs in the vase by the doorway, then swap the vase with the green jewel (the Earth Crystal) on the giant scale
- Take the crystal back to the village and give it to Rubie to place in the standing stones
Back to top of Area Quests List
Temple of Ard Quests
- Find and light four lanterns – requires 1 fire per lantern; note: you can tap on the large urns for rewards
- Collect 6 amber to destroy the vines blocking the doorway
- Find and repair the campfire – 2 stages: 1st=5 stones, 10 twigs; 2nd=5 softwood, 2 fire
- Find and repair the workbench – 1 stage: 6 saws, 10 plywood, 2 sheet metal
- Create amber potions with the workbench – 1 amber, 1 fire, 1 water, 10 minutes per potion
- Find the temple door key
- Find the 3 medallions needed to open the chest
- Open the chest – 3 stages: 1 medallion/coin per stage
- Open the temple door – 3 stages: 1st=4 amber potions; 2nd=2 potions; 3rd=the Key
- Find 4 tools (archaeological kits, 12 energy each; actually need to find 9)
- Each cat sand statue – 3 stages: 1st=3 trowels, 1 archaeological kit, 2 sand; 2nd=4 bricks, 1 archaeological kit, 2 trowels; 3rd=3 mortar, 1 archaeological kit, 2 gravel
- Follow the cat to a blocked doorway
- Go to the south and try to break through the wall – 3 stages: 1st=15 stones, 3 trowels, 2 sand; 2nd=4 bricks, 3 planks, 1 sheet metal; 3rd=2 beams, 2 cement, 2 mortar
- Break down another wall section – 3 stages: 1st=15 stones, 2 bricks, 2 sand; 2nd=3 planks, 4 pipes, 2 trowels; 3rd=2 beams, 1 modular wall, 2 mortar
- Break a third wall – 3 stages: 1st=3 sand, 3 screws, 5 gravel; 2nd=3 saws, 1 sheet metal, 10 stones; 3rd=3 planks, 2 hammers, 2 mortar
- Find 3 tiles to cross the hot platform while using fire to remove numerous fire thorns
- Cross the platform – 3 stages: 1st=5 stones, 3 trowels, 1 tile; 2nd=4 bricks, 2 tiles, 3 mortar; 3rd=(NOTE: 3d stage is a bug (sent in bug report on 4/25/22) – it is erroneously combined with the 2nd stage by the game, so 3rd stage does not occur but doing the 2nd stage does complete the quest)
- Cool the hot platform – find three Cold Ice and apply them to the platform
- Find a chest then find the three keys to open it; retrieve the item
- Follow the cat to the large doorway and then play the animal encounter spinner to shoo away the meerkats (100 points, 10 energy required per spin)
- Follow the cat to another doorway and play the spinner to remove the snakes; craft the pungi flutes needed for the spins on the workbench – 2 planks, 1 glue, and 1 wool per flute (10 minutes each); NOTE: a bug – clicking on the pungi stick icon on the spinner before making any pungis results in an alert that you have to build a Wisp House to make them – this is incorrect since you can make them on the workbench (bug reported on 4/25/22); once you have made a pungi the spinner works correctly
- Find black, blue, red, and yellow gems for the cat statues
Back to top of Area Quests List
Volcano Island Quests
- Light the Oracle’s beacon – 2 stages: 1st=10 twigs, 10 grass; 2nd=3 fabric (nearby spider webs)
- Find and collect amethyst
- Release the first petrified villager by restoring the first shrine using 1 amethyst, 2 glue, and 2 trowels
- Find the farmer’s shrine, and then repair the workbench – 3 stages: 1st=3 plywood, 1 saw, 3 gravel; 2nd=2 planks, 2 screws, 1 hammer; 3rd=2 pipes, 5 hardwood
- Collect 8 Fly (Volcanic) Ashes
- Cut more amethyst into a gem on the workbench using 1 amethyst, 1 glue, and 3 trowels
- Restore the farmer’s shrine – 2 stages: 1st=2 fly ash, 5 bricks, 3 beams; 2nd=1 amethyst gem, 2 glue, 2 trowels
- Create 4 fly ash bricks on the workbench; each requires 2 fly ash, 2 sand, and 2 cement
- Repair the farmer’s house – 3 stages: 1st=4 fly ash bricks, 4 bricks, 1 flooring; 2nd=1 modular wall, 1 window, 1 bed; 3rd=7 tiles, 1 quilt, 2 stools
- Help the farmer with his crops by collecting 3 seed mixes (requires 18 energy each) and 3 ancient sickles, and then building vegetable patches
- Build the 3 vegetable patches – 3 stages each: 1st=20 wood, 10 plywood, 20 grass; 2nd=5 pig feed, 10 gravel, 7 sand; 3rd=10 water, 1 seed mix
- Repair the potter’s shrine – 2 stages: 1st=4 fly ash bricks, 5 mortar, 3 beams; 2nd=1 amethyst gem, 2 glue, 2 trowels
- Repair the potter’s house – 3 stages: 1st=4 fly ash bricks, 4 bricks, 1 flooring; 2nd=3 modular walls, 5 chains, 1 bed; 3rd=7 tiles, 1 quilt, 2 stools
- Make 4 sets of kitchenware at the potter’s house
- Restore the chef’s house – 3 stages: 1st=4 fly ash bricks, 4 bricks, 1 flooring; 2nd=3 modular walls, 1 window, 1 bed; 3rd=7 tiles, 1 quilt, 1 desk
- Use the ancient sickles to harvest the 3 vegetable fields for a total of 12 vegetables
- Make 4 tacos in the chef’s house – each uses 3 vegetables, 4 dough, and 3 cheese
- Set the table with the tacos and kitchenware and have a hearty feast
- Find the 4th petrified stranger (Dr. Brock)
- Build a temple to free him – 3 stages: 1st=4 fly ash bricks, 5 screws, 5 planks; 2nd=5 bricks, 3 beams, 4 pipes; 3rd=1 amethyst gem, 3 glue, 2 trowels
- Search for the chest with the scanner then upgrade it using 3 glass and 4 sheet metal
- Scan three volcano areas using the upgraded scanner; to access each area requires an energy spinner (100 points needed, 5-25 points per spin)
- Go past the 2nd scan area to the hot cavern entrance, and then collect 6 dried magma (22 energy each)
- Go to Dr. Brock’s carriage and craft a heat-resistant amulet using the 6 magma rocks, 6 screws, and 3 chains (5 minutes)
Back to top of Area Quests List
Magma Basin Quests
- Explore to the north to encounter a dim fire wisp then warm it up using a spinner (uses fire, 100 points required); then find and heat up 3 more wisps
- Light another oracle’s beacon (10 twigs, 10 grass, 3 fabric in nearby chests)
- Explore to find the Forge and then begin repairs
- Collect 12 pieces of obsidian (plus 5 more) (requires 12 energy for 2 pieces of ore)
- Raise a magma pillar (5 obsidian ore, 3 screws, 2 glue)
- Build/repair/restore 3 other magma pillars: pillar #1 (4 obsidian ore, 1 sheet metal, 3 mortar), pillar #2 (4 obsidian ore, 2 pipes, 2 mortar), pillar #3 (4 obsidian ore, 1 sheet metal, 3 mortar)
- Use the pillars to redirect the magma into the forge (requires 10 energy to rotate each pillar 90 degrees)
- Repair the forge – 3 stages: 1st=4 glass, 6 pipes, 3 glue; 2nd=3 bricks, 4 mortar, 5 screws; 3rd=3 paper, 20 twigs, 3 fire
- Craft the Obsidian Heart (10 obsidian, 1 drill (found in a nearby chest), 5 fire)
- Craft the Obsidian Core (10 obsidian, 1 screwdriver (found in a nearby chest), 10 water)
- Find 3 metal sheets (rare, small, and large) and more obsidian ore
- Craft the 3 parts of the automaton – head (1 obsidian, 1 small metal sheet, 3 screws), torso (1 obsidian, 1 rare metal sheet, 2 sheet metal), legs (1 obsidian, 1 large metal sheet, 3 pipes)
- Find the wagon then explore to find the wheels
- Use spinners (with fire) to get the 4 wheels from the fire wisps
- Repair the wagon – 3 stages: 1st=6 pipes, 2 screws, 4 water; 2nd=4 wheels, 1 obsidian heart, 1 obsidian core; 3rd=1 torso, 1 legs, 1 head
- Explore north to find the exit and then clear the obstacles to finish the area
Back to top of Area Quests List
Mycena Grotto Quests
- Restore the campfire – 2 stages: 1st=5 stones, 10 twigs; 2nd=5 softwood, 2 fire
- Follow the pink wisp and cool down the three giant mushrooms (3 water, 3 sand, 10 truffles each) along the way
- Light the Oracle’s beacon – 2 stages: 1st=10 twigs, 10 grass; 2nd=3 fabric (found in nearby chests)
- Replace the broken bridge over the river – 3 stages: 1st=3 hammers, 7 screws, 3 metal beams; 2nd=7 saws, 5 beams, 2 flooring; 3rd=7 chains, 12 plywood, 5 glue
- Show the 3 Fire Wisps the way to the bridge by doing spinners for each one (using fire, 100 points each)
- Cool down the 3 burning mushrooms (3 water, 3 sand, 10 truffles each)
- Collect the Essence of Passion and add it to the Obsidian Heart
- Follow the Pink Wisp to the Shrine and restore it – 3 stages: 1st=8 trowels, 6 pipes, 10 bricks; 2nd=4 chains, 5 glass, 5 modular walls; 3rd=1 Obsidian Heart
- Collect 12 fly ash (6 piles of ash require 12 energy each)
- Make 6 Mushroom Fertilizer potions in the campfire using 2 fly ash, 2 water, and 1 jar each
- Use 1 jar of Mushroom Fertilizer and 5 pig feed to revive each mushroom
- Collect the Essence of Love from the pink wisps and add it to the Obsidian Heart
- Add the finished automaton Heart to the cart and explore to find the exit to the grotto
Back to top of Area Quests List
Wisdom Growth Quests

- Explore to find the Oracle’s Beacon
- Light the beacon – 2 stages: 1st=10 twigs, 10 grass; 2nd=3 fabric (nearby spider webs)
- Find the water source and then repair the five watering systems – each system has 3 stages: 1st=6 pipes, 3 glue, 3 metal beams; 2nd=3 bricks, 1 tube (found nearby), 5 trowels; 3rd=5 screws, 5 water, 3 sheet metal
- Explore to find the metal gate and find the first mirror
- Help the birds by finding four portions of bird feed, and rebuilding three trees – 2 stages for each tree: 1st=5 saws, 2 beams, 10 sand; 2nd=20 twigs, 2 glue, 3 chains
- Build a new bird house – 3 stages: 1st=5 planks, 2 mortar, 3 flooring; 2nd=2 sheet metal, 3 glue, 3 modular walls; 3rd=50 peas, 4 sheep feed, 5 bird food (find the needed fifth one nearby)
- Repair the first mirror – 3 glass, 2 glue, 2 mortar
- Repair the second mirror by finding five shovels (requires 15 energy each), plus 5 saws and 5 water.
- The meerkats need a new home – 3 stages: 1st=20 twigs, 3 beams, 5 trowels; 2nd=3 saws, 20 grass, 2 mortar; 3rd=4 planks, 4 screws, 3 glue
- At the third mirror one of the bunnies is hurt, help it by gathering 4 healing leaves (14 energy each)
- Repair the workbench – 6 saws, 10 plywood, 2 sheet metal
- Make a leaf bandage on the workbench
- Heal the bunny using 1 leaf bandage, 3 sheep feed, and 2 water
- Repair the third mirror – 2 saws, 2 hammers, 5 fire
- Rotate the three mirrors (10 energy for every 90 degrees of rotation) three times each to point at the metal gate to open it
- Take the obsidian core from the automaton cart, place it in the shrine, and activate it
- Explore to find the exit cavern to the next area
Back to top of Area Quests List
Crystal Cave Quests
- Explore the cave and restore the campfire – 2 stages: 1st=5 stones, 10 twigs; 2nd=5 softwood, 2 fire
- Build a workbench – 3 stages: 1st=3 plywood, 1 saw, 3 gravel; 2nd=2 planks, 2 screws, 1 hammer; 3rd=2 pipes, 5 hardwood
- Use the workbench to make a Ladder – 1 plank, 1 beam, 1 saw; then make a Roof – 6 glue, 2 beams, 1 hammer
- Build a Lookout Tower – 3 stages: 1st=2 flooring, 3 bricks, 5 gravel; 2nd=1 ladder, 4 beams, 3 screws; 3rd=1 roof, 2 windows, 2 stools
- Explore to the Floating Rocks and build a railway across them for the automaton cart
- Mine 12 obsidian ore (requires 12 energy per 2 portions), and craft 12 rails on the workbench (2 obsidian, 2 fire, 2 screws each)
- Build the railway – 3 stages: 1st=12 rails, 4 mortar, 1 hammer; 2nd=12 sand, 12 gravel, 3 glue; 3rd=3 saws, 4 butter, 12 plywood
- Solve the rail puzzle – rotate the rail sections to connect them up across the rocks; each 90 degree rotation uses one screw (19 screws total required)

- Explore to find a place to assemble the automaton, and build a frame – 3 stages: 1st=5 gravel, 3 bricks, 1 flooring; 2nd=3 chains, 8 planks, 3 modular walls; 3rd=4 tiles, 4 quilts
- Collect the automaton parts from the cart and then assemble them on the frame – 3 stages: 1st=1 metal head, 1 metal torso, 3 chains; 2nd=1 metal legs, 2 screws, 2 sheet metal; 3rd=1 awakened core, 1 awakened heart, 8 glue
- To make lubricant (oil) for the squeaky automaton: explore to find one rapeseed plant and collect its seeds (5 energy gives 2 portions)
- Build an Oil Mill – 3 stages: 1st=1 flooring, 4 bricks, 5 trowels; 2nd=3 screws, 2 beams, 2 cans; 3rd=3 glass jars, 2 sheet metal, 2 glue
- Collect 18 more portions of rapeseed (9 plants) for the oil mill
- Produce 4 cans of lubricating oil – each requires 5 rapeseed portions, 20 wheat, and 1 water
- Start making Biofuel by collecting 20 Sugar Beets then process them in the mill to create 2 Biofuel: each requires 10 beets, 1 water, and 5 sugar
- Complete the automaton station – 2 stages: 1st=4 oil, 1 quilt; 2nd=2 Biofuel, 2 pipes
- Find a natural energy source (large, sparkling crystals nearby)
- Collect 15 copper scraps and 15 rubber portions in the nearby areas
- Create electrical cables: make 15 copper wires on the workbench (3 fire, 1 hammer, 3 copper scraps for 3 wires); make 15 cables on the workbench (3 copper wires, 3 rubber portions and 3 sheet metal for 3 cables)
- Build an Electrical Transformer – 3 stages: 1st=1 flooring, 2 bricks, 3 gravel; 2nd=2 metal beams, 2 pipes, 4 glue; 3rd=4 cans, 5 glass, 2 fabric rolls
- Build Lightening Rods – 3 stages: 1st=4 yarn, 2 mortar, 2 pipes; 2nd=2 screws, 2 glue, 4 cans; 3rd=4 glass, 4 tiles
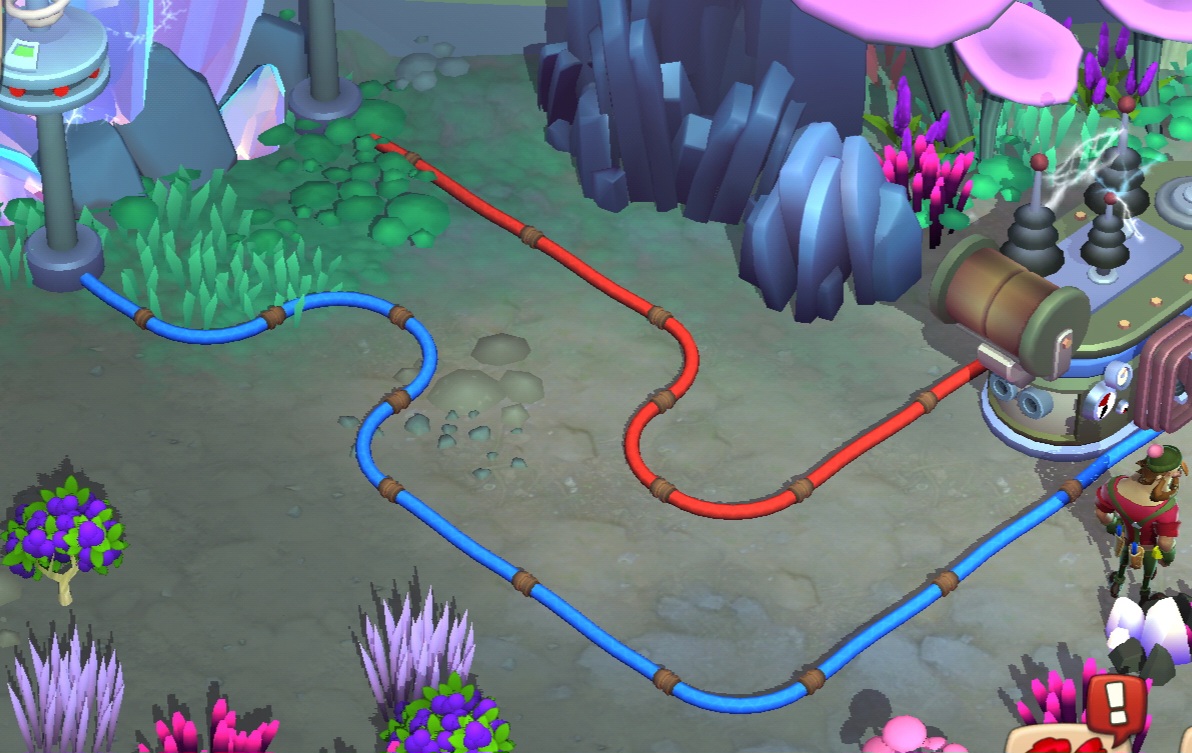
- Solve the cables puzzle – rotate the blue and red cables to connect them between the crystals and the transformer; each 90 degree rotation uses 10 energy (14 blue rotations and 7 red rotations required)
- Calibrate the now-awakened automaton’s language using a spinner (100 points needed, 10 energy required per spin)
- Clear the way to the first transmitter location, then build it – 3 stages: 1st=3 gravel, 2 mortar; 2nd=6 cement, 4 metal scrap (collected nearby), 2 glue; 3rd=1 can, 2 glass, 1 power cable (will need to collect more rubber and copper scrap, and then create more wire and a power cable on the workbench)
- Build five more transmitters on the spiral path using the same resources as before; total amounts needed are: 15 gravel, 10 mortar, 30 cement, 20 metal scrap, 10 glue, 10 glass, and 5 power cables
- Make your way to the golem and receive the Metal Crystal; go back to the Village, give it to Jack who will place it in the Circle of Stones; 4 stones completed, 2 to go, and the next area is called “Summertide Forest”
Back to top of Area Quests List
Summertide Forest Quests
- Find and restore the campfire – 2 stages: 1st=5 stones, 10 twigs; 2nd=5 softwood, 2 fire
- Explore to the Oracle’s Beacon and light it – 2 stages: 1st=10 twigs, 10 grass; 2nd=3 fabric (nearby spider webs; collecting each requires 12 energy)
- Begin to thaw out the cold fire wisps by finding and restoring 4 braziers – each requires 3 paper, 2 fire, and 5 wood
- Go to each of the 4 frozen wisps and use the spinner to ignite them – 1 fire to spin, 100 points per spinner required
- Follow the wisp northwards to the locked gate
- Repair the 3 mystical pillars (Note: some stages may be incorrect, please verify) – the left pillar has 3 stages: 1st=2 bricks, 6 pipes, 3 glue; 2nd=3 beams, 4 mortar, 5 screws; 3rd=2 sand, 1 glass, 1 sheet metal; the middle pillar has 3 stages: 1st=4 mortar, 6 pipes, 7 planks; 2nd=3 beams, 5 pipes, 3 bricks; 3rd=2 glue, 1 glass, 1 sheet metal ; the right pillar has 3 stages: 1st=2 bricks, 5 screws, 2 beams; 2nd=3 glue, 4 mortar, 1 sheet metal; 3rd=4 pipes, 1 glass, 2 planks
- Help 4 more wisps using spinners: fire and 100 points each
- After the last wisp is rescued light the Big Brazier using 7 planks, 5 fire, and 6 paper; obtain the Eye of Fire there
- Collect 10 colorful phoenix feathers (requires 15 energy each), restore the stove using 50 twigs and 20 wood, then burn the feathers and gather the Phoenix Ash (takes 10 minutes)
- Find 5 frozen foxes and de-ice them by tapping on them 3 times (15, 10 and 5 energy per each fox)
- Gather 10 frozen carrots (requires 15 energy each), cook 5 portions of soup (2 carrots, 10 eggs, 1 water and 10 minutes each), and feed the hot soup to the foxes
- Head north and build the foxes a new home – tap on the spot twice (15 energy total), then light the nearby brazier (3 paper, 2 fire, 5 wood)
- Receive the Tju Tju Pearls from the foxes
- Go to the center of the area and build a workbench using 6 saws, 10 plywood, and 2 sheet metal
- Craft the Sphere of Eternity using the Eye of Fire, 1 fire, and 2 glass; craft the Sphere of Immortality using the Phoenix Ash, 1 fire, and 2 glass; craft the Sphere of Life using the Tju Tju Pearls, 1 fire, and 2 glass; all spheres take 10 minutes on the workbench
- Place the spheres on the mystical pillars and rotate the pillars to point toward the gate; each rotation requires 10 energy, and the gate will open

- Thaw the frozen egg by tapping on it 3 times (30 energy total); this task completes the Summertide Forest quests
Back to top of Area Quests List
Azmar’s Nest Quests

Azmar’s Nest Icon
- Find out more about the Phoenix egg – explore to find the guard
- Strengthen the Fire Guardian by completing 3 tasks
- First Guard Task: Build the campfire – 2 stages: 1st=5 stones, 10 twigs; 2nd=5 softwood, 2 fire
- Second Guard Task: Make a Lunchbox of 2 strawberry pies, 2 pumpkin pies, and 1 ice cream cake
- Third Guard Task: Give the Guard the Lunchbox
- Head for the mountaintop – clear three snowbanks that require 25 energy each
- Cut down the large tree to span the gorge: requires 30 energy
- Build a spiral staircase – 3 stages: 1st=1 metal beam, 2 screws, 5 gravel; 2nd=20 plywood; 3rd=5 pipes, 1 glue
- Build a mountain camp – 3 stages: 1st=2 metal beams, 2 screws, 1 sheet metal; 2nd=15 hardwood, 1 saw, 1 stool; 3rd=1 bed, 2 canned tomatoes, 4 quilts
- Free the Altar from the snow (15 energy), then process the Heat Hole – 3 stages: 1st=5 fire; 2nd=5 trowels, 5 mortar, 5 planks; 3rd=1 heat collector
- Construct the heat collector in the Mountain Camp using 8 mortar, 4 pipes, and 4 quilts
- Repair the Fire Bowl in the Mountain Camp using 2 screws, 4 glue, and 3 sheet metal and then put it back on the Altar
- Head east to find Firewood and Tinder for the fire
- In the Village do three tasks for the Freezing Villagers:
- Village Task #1 – Repair each of the four cabins using 25 energy, 5 hay bales, 15 twigs, and 1 window
- Village Task #2 – Repair the table to serve a big meal – 3 stages: 1st=1 desk, 2 stools, 2 glass jars; 2nd=3 canned tomatoes, 3 pickles, 5 milk; 3rd=1 pumpkin cheesecake, 2 donuts, 2 cheese
- Repair the Fire Bowl in the Mountain Camp using 2 screws, 4 glue, and 3 sheet metal
- Village Task #3 – Build the Bonfire – 2 stages: 1st=25 stones, 25 twigs; 2nd=1 chopped wood, 1 tinder fungus, 3 fire
- Chopped Wood – explore to obtain the tinder (20 energy), and then find the large tree and obtain two loads of wood (20 energy each) and then take them to the Mountain Camp for processing (5 minutes each)
- Complete the Bonfire with the 1 wood, 1 tinder and 3 fire
- Use the remaining stack of wood and tinder to light the Fire Bowl and incubate the dragon’s egg
- To make the fire hotter obtain 4 meteor metal crafted into mirrors; explore to find the meteor and “mine” it using a spinner (100 points)
- Craft the 4 mirrors in the Mountain Camp using 1 ore, 1 pipe, and 1 glass each (5 minutes each)
- Install the finished mirrors on the four pillars which also require 3 mortar and 1 glue each
- The fire gets out of control and emits 27 Phoenix Odem Sparks which you must collect three at a time from all over the explored portions of the area (no cost except exploration obstacles)
- Rotate the four outer large altar circles using the Sparks until they match up with the center lines, rotate the inner 8 squares until they form a fully-connected pattern with the outer circle’s lines, and finally rotate the pillars until all 27 Sparks are used

- The egg hatches into the Phoenix bird, Azmar; obtain feed for him by gathering 3 fish, 3 insects, and 3 seeds (all require 8 energy each)
- Make bird seed in the campfire in the Mountain Camp (30 minutes) and feed Azmar
- Explore to the north to the sea and move the icebergs into a bridge to cross over to the other side (10 energy each move)

- This completes this area
Embers Garden Quests

- Build the campfire – 2 stages: 1st=5 stones, 10 twigs; 2nd=5 softwood, 2 fire
- Search for and collect 7 ropes (requires 10 energy each)
- Repair the Bridge – 2 stages: 1st=3 ropes, 5 planks, 5 bricks; 2nd=2 mortar, 7 plywood, 4 ropes
- Follow Azmar to the 6 frozen flowers; free them using 30 energy each
- Search for 12 portions of mud (requires 12 energy each) and use 2 each (plus 1 water) to fertilize each flower
- Follow Azmar to the base of the waterfall and build a dam – 3 stages: 1st=2 mortar, 5 planks, 1 sheet metal; 2nd=4 screws, 3 plywood, 3 gravel; 3rd=1 pipe, 1 flooring, 2 sand
- Build a bridge to the other side of the river – 3 stages: 1st=2 gravel, 5 glue, 10 bamboo wood (gather nearby, 8 energy for 2 pieces); 2nd=5 chains, 2 sand, 10 bamboo wood; 3rd=2 plywood, 2 flooring, 10 bamboo wood
- Coax the three bunnies to cross the bridge using a spinner (10 energy required per spin, 100 points total needed)

- Follow the fire wisp to the flooded wisp village and repair their homes
- Dry the 5 houses with 25 energy each, then ignite each of them with 2 tinder (found nearby, requires 15 energy each to collect), 1 fire, and 5 twigs
- Ignite the 3 cold fire wisps using spinners (1 fire required per spin, 100 points total needed)
- Receive the thief’s dropped bottle then follow Azmar to the dropped glove, and then to the thief’s camp
- Gather 7 insects (2 sugar, 1 glass jar, and 1 water for each)
- Feed the hungry Azmar – 3 stages: 1st=10 eggs, 3 truffles, 2 insects; 2nd=15 peas, 5 milk, 3 insects; 3rd=10 peas, 10 eggs, 2 insects
- Follow Azmar to the collapsed mine entrance then search the area for 6 shovels (found in boxes and cost 15 energy each to open)
- Gather the previous 6 unfrozen fire flowers using spinners (10 energy required per spin, 100 points total needed)
- Make the Fire Dynamite using the fire flowers at the camp (you can also make water here from any leftover ice)
- Unseal the mine entrance – 3 stages: 1st=3 shovels; 2nd=3 shovels; 3rd=1 Fire Dynamite
- This completes the Embers Garden area
Back to top of Area Quests List
Abandoned Mine Quests
- Follow the Thief; remove the giant boulder (30 energy)
- Remove the second boulder then recover the thief’s shoe
- Repair the pillar, column, and prop to continue the chase
- Pillar – 3 stages: 3 stages: 1st=5 plywood, 5 mortar, 2 screws; 2nd=3 glue, 1 pipe, 3 gravel; 3rd=1 sheet metal, 2 planks, 2 sand
- Column – 3 stages: 1st=5 planks, 2 mortar, 1 sheet metal; 2nd=4 plywood, 4 screws, 3 gravel; 3rd=4 pipes, 1 flooring, 2 beams
- Prop – 3 stages: 1st=5 planks, 2 gravel, 1 pipe; 2nd=3 plywood, 2 modular walls, 3 sheet metal; 3rd=2 screws, 1 metal beam, 2 mortar
- Encounter the group of meekats and then find their damaged burrow
- Restore the burrow by removing the dirt (30 energy total), and then find 8 moss (found on mossy rocks, 16 energy per two moss)
- Repair the burrow – 3 stages: 1st=5 planks, 2 mortar, 3 moss; 2nd=3 plywood, 20 grass, 3 moss; 3rd=4 pipes, 1 flooring, 2 moss
- Lure the meerkats back to the burrow by making food: 20 eggs and 10 cucumbers
- Gain the meerkats’ trust by using a spinner (100 points needed, 10 energy per spin)
- Repair the automatic coal wagon with 5 planks, 5 screws, and 3 sheet metal
- Fix the rails for the coal wagon – rotate the rail sections by using 4 screws

- Continue north and remove more boulders (30 energy each)
- Pick up the thief’s other shoe
- Find the thief and recover the damaged fire crystal
- Give the shoes back to the thief
- Repair the workbench using 6 saws, 10 plywood, and 2 sheet metal,
- Gather 18 Aloe Vera plants (10 energy per two), and 12 Big Leaves (12 energy per two), and add 6 water on the workbench to make 3 balms to heal the thief
- Pay off the thief’s debt (25000 gold)
- The thief tells you that there is a big treasure behind a big boulder; remove the boulder to get the treasure
- This completes the Abandoned Mine area
Back to top of Area Quests List
Mount Shimaira Quests
- Explore southeast to find Azmar and Nara near the inactive Fire Temple
- Head west toward a Fire Geyser but make a pitstop for food for Nara to the north
- Build a campfire with oven in 3 stages: 1st=5 bricks, 2 glue, 3 trowels; 2nd=35 twigs, 15 wood, 2 chains; 3rd=1 pipe, 2 screws, 15 fire
- Collect 9 Mountain Potatoes (15 energy for 3) and 3 Lupines (15 energy each) and make bread and soup in the campfire/oven (15 minutes each) for Nara
- Collect 3 worms (9 energy each) and 3 seeds (9 energy each) to make bird seed in the fire for Azmar
- Go southwest past the boulder (12 energy) to a Fire Geyser and plug the out-of-control fire to redirect the lava to the Fire Temple in 3 stages: 1st=1 Big Rocks, 2 glue; 2nd=1 Big Rocks, 4 sand; 3rd=1 Big Rocks, 2 cement

- Explore south to find the Big Rocks (3 x 20 energy to collect)
- Go west and south into the spiral path toward the 2nd Geyser
- Past the boulder (12 energy) the ground is too hot to walk on so head north to find some tantalum carbide ore (14 energy for 2 portions) to make fireproof shoes
- Repair the workbench in 3 stages: 1st=3 plywood, 1 saw, 3 gravel; 2nd=2 planks, 2 screws, 1 hammer; 3rd=2 pipes, 5 hardwood
- Explore to collect 3 more piles of tantalum carbide ore (total of 42 energy)
- Process the ore on the workbench to make 4 ingots, then make the fireproof shoes using the 4 ingots, 12 yarn, and 6 quilts (30 minutes)
- Continue on to the 2nd geyser and plug it up in the same manner as above (find and collect 6 Big Rocks – requires 3 x 40 energy)
- Head south toward the final geyser but you encounter a fiery path that blocks your way; continue south and collect 24 portions of dried magma (12 energy for every 3 portions)
- Create 8 Bridge Parts on the workbench using 3 dried magma, 1 screw, and 2 bricks for each one (10 minutes)
- Build the bridge stairs and long bridge parts in 8 steps using 1 Bridge Part, 1 flooring, and 5 gravel for the stairs, and 1 Bridge Part, 1 metal beam, and 2 glue for each long part
- Align the Bridge Parts in 12 moves using 20 energy per movement

- Fix the final geyser after collecting more Big Rocks (3 x 20 energy)
- Make a Fire Shield against the new flaming sky rocks using spinners for Nara and Azmar (100 points each) to obtain their Flames, then craft the shield on the workbench using the two Flames and 2 sheet metal (30 minutes)
- Head north to the Fire Temple, clearing the 4 molten stones blockages (45 + 35 + 25 energy each) along the way
- Repair the Landing Stage in 3 stages: 1st=5 bricks, 2 glue, 1 flooring; 2nd=2 sheet metal, 4 screws, 2 beams; 3rd=1 Fire Shield
- Receive the Fire Crystal and return it to the Village

This completes the Mount Shimaira stage
Back to top of Area Quests Lis
Woodlands (Again) Quests
- Collect 6 Fire Flowers and produce 2 Fuel in the Tower (5 minutes each)
- Fix the balloon in 2 stages: 1st=1 quilt, 5 threads, 5 screws; 2nd=2 balloon fuel

- Head southwest to find Albert
- Explore west to find the 3 Blueprints for the Diving Suit (30 energy to dig them out of the pile of tools)
- Head north to repair and reopen the mine in 2 stages: 1st=2 planks and 8 screws; 2nd=2 chains, 1 flooring, and 1 saw, then collect the 6 portions of ore from the mine cart
- Begin crafting the Diving Suit in the house/workshop: firstly, the Helmet requires 1 Blueprint, 2 Ore, 2 glass, and 25 minutes
- Head south and east to visit Greta
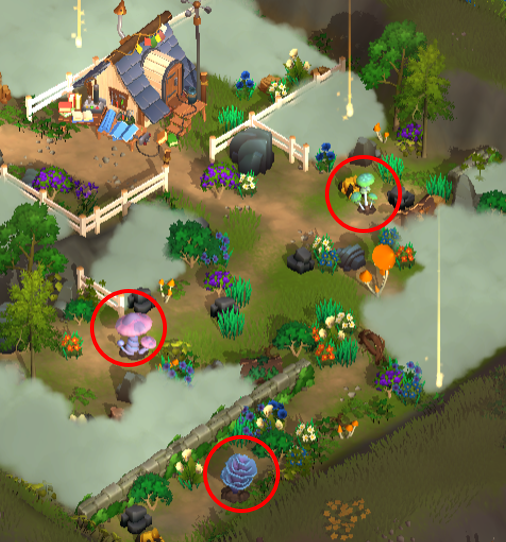
- Explore to find the 3 rare colored (Blue, Pink, and Green) mushrooms and collect them with spinners (100 points needed, 5 or 10 energy per spin)
- Build planting shelves for her mushrooms in 2 stages: 1st=4 beams, 5 pipes, 1 saw; 2nd=1 Blue Mushroom Seed, 1 Pink Mushroom Seed, 1 Green Mushroom Seed

- Start making a waterproof diving suit by crafting 2 Waterproof Fabric in the house/workshop using 5 water and 2 fabric (5 minutes each), then craft Copper sheeting using 5 fire, 5 iron bars, and 2 Ore from the mine (15 minutes)
- Craft the Waterproof Suit using the 2 Fabric, 1 Blueprint, and 2 Ore (10 minutes)
- Craft the Diving Boots using 1 Copper, 1 Blueprint, and 2 sheet metal (10 minutes)
- Assemble the Suit (10 minutes) and put it on by the lake
- (Optional) Break down the Wall (requires 80 energy) to speak with Sally and gain the treasure behind it
This completes The Woodlands (Again) stage
Back to top of Area Quests List
Underwater Valley Quests
![]()
1. Explore to collect air from 4 Bubble Corals (9 energy each)

2. Follow Ara along the Symbols’ path
3. Create a “Fire” using the nearby Geyser and 15 clay, 15 twigs, and 5 fire then use it to create energy: 25 for 5 mushrooms or 20 for 3 Mussels
4. Follow the path of the columns with the wave inscriptions to the massive Gate; it’s dark under the water so you’ll need to create some light
5. Find a Bioluminescent Coral patch to the northwest; it’s in bad shape so help it in 2 stages: 1st=5 coral branches (collect nearby, 12 energy each), 10 sand, 3 trowels; 2nd=2 pig feed, 5 sugar

6. Collect 2 Coral Algae (to the west, 15 energy each) and create a Glowing Essence using the algae and 1 bottle (10 minutes)

7. Use the Essence on the first column to read the inscription: “Arms aplenty, a farmer’s bounty, here is where I lay my prize.” -> The Octopus’s Garden
8. Head to the Garden to the west and dig through 3 piles of seashells (15 +10 + 5 energy each) to find the Octopus’s Coral Piece
9. Make another flask of Glowing Essence (explore to obtain 2 more coral algae) to read the second column’s inscription: “Like a flower, my petals flow through the ocean currents…Millions of lives seek the shelter I provide, but an unlucky few become my prey.” -> Anemone Reef
10. Head to the far east to the Reef to see the giant Turtle; to trade for the Anemone Coral Piece find 3 Pearls to the south in giant oysters (use spinners for each pearl, 10 energy per spin, 100 points total)

11. Create a third flask of Glowing Essence for the last column; “A point of three, my scepter be. Hold it as I sit upon my seat of power, ruling the ocean and all who dwell within.” -> Poseidon’s Throne.
12. Head north to the Throne and locked chest; find the three colored keys in the nearby area (5 energy each to pick them up) and open the chest with them to receive the Trident Coral Piece

13. Create the fourth flask; using it on the fourth pillar results in: “Babies, babies everywhere, dancing and galloping here and there…here we learn and grow, safe in our father’s embrace.” -> Seahorse Nursey
14. Head south to the Nursery, then create a Floating Pearl at the Geyser using 1 more Glowing Essence (last one!), 2 Air Bubbles, and a Pearl (search northeast from the seahorses) to obtain the Seahorse Coral Piece
15. Collect more air bubbles (to reach an on-hand total of 9) (requires 9 energy each)
16. Go to the Gate and place the 4 coral pieces in the slots, rotate each of them until they don’t go any farther (each rotation requires one air bubble), and it will open

This completes the Underwater Valley stage – next is the Tornado Cliffs stage
Back to top of Area Quests List
Tornado Cliffs Quests
![]()
- Follow Maruti west and north to the broken elevator
- Head southwest to the Dead Forest and then go to Maruti’s house behind the fence to the north and repair the campfire in 3 stages: 1st=15 stones, 25 twigs, 3 sand; 2nd=10 wood, 10 softwood, 10 hardwood; 3rd=1 sheet metal, 2 fire, 2 water
- Cook (lots of) pumpkin soup using 5 water, 10 butter, and 100 pumpkins (5 minutes) and then give it to Maruti
- Light the 5 metal torches using 5 twigs, 1 glue, and 1 fire each
- Remove the 9 dead trees in the Dead Forest using 1 hay bale, 3 dry twigs, and 1 fire each
- Head southeast to the river and make your way to the peninsula with the Water Wheel, clearing away the stones blocking the bridge (18 + 7 energy)
- Repair the Water Wheel in 3 stages: 1st=1 flooring, 2 modular walls, 2 windows; 2nd=5 glue, 8 plywood, 4 paper; 3rd=12 glass jars, 4 pipes, 20 threads

- Now build the Water Line to the Forest from the Water Wheel: 5 Curved Lines require 2 screws, 3 twigs, 1 plank each; 6 Straight Lines require 2 screws, 2 twigs, 1 plank each; the 1 End Line requires 2 screws, 4 twigs, 2 planks
- Rotate the sections to make a continuous trough for the water (12 energy per rotation, 17 total rotations)
- Next loosen the soil in 4 rows for the new trees using 2 trowels and 5 long grass per row
- Head southeast to find Soil Minerals – collect them using 15 + 25 + 35 energy
- Add the minerals to each tree row using 1 Mineral, 2 gravel, and 2 truffles
- Up north repair the broken workbench in 3 stages: 1st=3 plywood, 1 saw, 3 gravel; 2nd=2 planks, 2 screws, 1 hammer; 3rd=2 pipes, 5 hardwood
- Collect 10 portions of limestone (12 energy for 2 portions)
- Shape the limestone portions into blocks on the workbench (2 portions per block, 5 minutes each)
- Repair the forge in 3 stages: 1st=2 flooring, 10 sand, 15 gravel; 2nd=2 modular walls, 10 shaped limestone, 20 mortar; 3rd=25 iron bars, 15 plywood, 30 small coal ore
- Explore the south winding path to find the Mother Plant and collect 4 Seeds (35 + 25 + 15 energy), and then plant the seeds in the trees’ rows

- Repair Maruti’s house in 3 stages: 1st=1 flooring, 1 modular wall, 2 windows; 2nd=2 stools, 1 desk, 1 bed; 3rd=2 quilts, 8 yarn, 2 screws
- Follow the Winged Squirrel to the southeast to an injured squirrel, and then collect 3 nearby leaves (12 energy each), create a bandage on the workbench using 6 threads (5 minutes), heal the squirrel, and receive a Wind Essence
- Collect 12 portions of wood from the new tree farm (5 energy each), use the workbench to create 12 Processed Wood (3 minutes for each 3)

- Repair the elevator in 2 stages: 1st=12 Processed Wood, 5 metal beams, 12 chains; 2nd=1 windlass (see step 28 below)
- Start steel production by collecting another 6 limestone, crafting 6 iron bars (in the Village), and collecting 6 portions of chrome ore (12 energy for 2 portions) found to the northeast across the “root bridge” from the Mother Tree and beyond the blocking boulder (12 energy to pass)

- Produce 6 bars of Steel in the Forge using the limestone, chrome ore, and iron bars (5 minutes per 2 bars)
- Follow Maruti to a white tornado and then tap/click on it to dissipate it using the air essence the wounded squirrel gave you

- Continue east to gather more air essences from 2 flying squirrels (3 each) using spinners (10 energy per spin, 100 points required) and dissipate the remaining 6 tornados

- Move south to repair the Meditation Area in 3 stages: 1st=5 bricks, 50 grass; 2nd=15 sand, 5 tiles, 25 twigs; 3rd=15 wool, 4 fire

- Go back to the Forge and repair the Bellows in 3 stages: 1st=3 beams, 6 screws, 2 sheet metal; 2nd=4 pipes, 6 quilts, 8 yarn; 3rd=2 chains, 4 paper, 3 cement
- Craft the Windlass in the forge using 5 metal bars, 12 hardwood, and 2 screws (10 minutes)
- Finish repairing the elevator (see #21 above)
The completes the Tornado Cliffs stage.
Back to top of Area Quests List
Air Peaks Quests
![]()
- Head north along the winding route to the house and meet Sheila
- Go to the pasture and collect the yak milk then collect 3 yak fur using spinners (10 energy per spin, 100 total needed)
- Heat some yak milk on the campfire using 1 milk and 1 sugar (10 minutes) to gain 20 energy
- Create winter clothes on the Loom using 3 yak furs, 15 yarn, and 9 quilts (20 minutes) and put them on
- Head north past the blocking boulder (12 energy) to meet with Sheila again and then swing around the wild yaks to the west and north
- At the cauldron light incense sticks using 15 twigs, 15 fire, and 15 wool
- Head south to search for a yak companion, collecting the 2 yak flowers along the way (18 energy each)
- At the yaks group, discover a young one that needs a scarf, and make it on the loom using 30 strawberries and 5 yarn, and then feed it one of the yak flowers and give it the scarf

- Remove the downed tree (15 + 25 + 35 energy) and reunite the yak with its family using a spinner (10 energy per spin, 100 points needed)
- Head south to the yak battle and check on the loser then give him the remaining yak flower and use a bandage on him
- Head east with your new friendly yak and then save him from the freezing river water using energy (10 x 3)
- To begin to warm up your cold yak collect 3 portions of Himalayan Fir Timber (10 energy each) and 3 portions of Himalayan Fiber (10 energy each)
- Rebuild the warming shelter in 3 stages: 1st=3 Himalayan Fir Timber, 3 glue, 3 beams; 2nd=5 planks, 4 pipes, 4 screws; 3rd=40 twigs, 20 hardwood, 5 fire

- Craft 3 Tools using 1 portion of Himalayan Fir Timber, 1 portion of Himalayan Fiber, and 1 glue for each, and then use the 3 tools on the yak to dry and brush him
- Knit a Yak Blanket in the shelter using 5 Fiber, 5 thread, and 5 yarn, a Saddle using 3 Fiber, 15 wool, and 2 quilts, and a Harness using 3 Fiber, 2 pipes, and 3 chains
- Saddle-up your yak and test drive him using a spinner (10 hearts per spin [you earned 50 by warming up the yak], 50 points required)

- Head north and then follow the flying squirrel even further north to the Wind Sphere
- Stabilize your floating yak using energy: 25 + 35 + 45

This completes the Air Peaks stage – next is Floating Temples.
Back to top of Area Quests List
Floating Temples Quests
- Repair the Blue broken altar using 10 water, 6 bricks, and 6 trowels
- Meet Sasha and then explore to find and collect 6 colored lilies (9 energy each)
- Craft a Sad Memory from the blue lilies on the Blue Altar using 2 blue lilies, 5 quartz, and 5 grass (5 minutes)
- Head west to the Purple Altar and repair it using 10 water, 6 beams, 6 hammers
- Craft a Curious Memory using 5 iron ore, 2 purple lilies, and 5 grass (5 minutes)
- Head south to the Orange Altar and repair it using 10 water, 5 tiles, and 6 saws
- Craft a Scary Memory using 2 fire, 2 orange lilies, and 5 grass
- Select Sasha and apply the 3 memories to him and receive 2 Temple Power portions

- Search for the 4 missing Core Pieces beyond the blocking boulder
- Use the 2 Temple Power portions to rotate the bridge
- (Optional) Restore the campfire using 5 stones, 10 twigs, 5 softwood, and 2 fire
- Remove the piles of rubble (30 + 20 + 10 energy) per 2 Pieces
- Move northeast to the chasm (oh, no, another bridge!); collect a lot more colored lilies (18 total); craft 2 more Temple Powers at the Orange Altar and use them on the rotating bridge
- Begin collecting 3 widely-scattered Mystic Flowers (20 energy each)
- Collect 3 portions of Lightning using spinners (10 energy per spin, 100 total needed)

- Oh, no, another bridge out! Repair it in 2 stages: 1st=25 softwood, 6 beams, 12 screws; 2nd=3 chains, 6 plywood, 5 bricks
- Rotate the double-bridge after collecting more lilies and crafting 2 more Temple Powers

- Head east to the Willow’s Altar and repair it in 2 stages: 1st=12 sand, 6 trowels, 12 gravel; 2nd=20 water, 15 clay, 8 glass
- Create 3 more Temple Powers on the Willow’s Altar (after collecting more lilies), and then create a Wind Power on the Altar using the 3 Temple Powers, the 3 Mystic Flowers, and the 3 Lightning portions (12 minutes)

- Collect more lilies and use the Blue Altar to create 2 final Temple Powers
- Head west to find the Windmill and repair it in 3 stages: 1st=8 bricks, 10 mortar, 2 metal beams; 2nd=8 fabric, 8 paper, 6 beams; 3rd=2 Temple Powers
- Create 3 Puffs of Air in the Windmill, each requiring 1 Temple Power (created at the Altars), 3 glass, and 15 cotton (7 minutes)
- Head north past the blocking boulder to the Core: insert two Core Pieces and 1 Wind Power
- Add the 3 Puffs of Air – one-by-one – to activate the Core
This completes the Floating Temples stage – next is Cloud Realm.
Back to top of Area Quests List
Cloud Realm Quests
- Explore north to find Anila, the Air Guardian, restoring the campfire along the way
- Continue northwest past the blocking boulder to the Air Coffer
- The Coffer is broken; search for the 3 missing Gears to the south (15 energy each to pick them up), and start repairing the Coffer by using the 3 Gears

- Head north to find and collect the 3 Pipes
- A bridge along the way requires repairs in 2 stages: 1st=5 planks, 8 screws; 2nd=4 glue, 5 plywood
- After collecting the 3 pipes continue west to the destroyed Temple of the Skies
- Start restoring the Temple by repairing the 2 lamps using 2 planks, 2 screws, and 3 fire each
- Revive the 4 potted cypress trees with 5 water each
- Fix the Temple building in 3 stages: 1st=3 beams, 1 flooring, 3 bricks; 2nd=3 hammers, 8 screws, 1 modular wall; 3rd=8 planks, 4 glue, 4 mortar
- Fix the 3 pipes on the Temple’s workbench using 1 pipe, 5 sand, and 2 glue for each
- The 2nd stage in repairing the Air Coffer is now adding the 3 fixed pipes to it
- Head south to find the Wind Melody (it’s a long way away)
- Repair (another) bridge in 2 stages: 1st=5 planks, 8 screws; 2nd=4 glue, 5 plywood
- Encounter a large black cloud blocking your path

- Repair the Big Windmill in 2 stages: 1st=8 bricks, 10 mortar, 2 metal beams; 2nd=8 fabric, 8 paper, 6 beams
- Create 6 Puffs of Air using 1 glass, 5 cotton and 1 paper each
- Create 3 Paper Windmills to direct the wind from the big windmill; each has 2 stages: 1st=1 beam, 4 screws; 2nd=4 paper, 4 threads, 2 glue
- Apply the Puffs to the Paper Windmills and then continue south and east to the Melody (20 energy to collect it)

- Finish repairing the Air Coffer by placing the Melody on it
- Begin collecting materials for the Serenade Flute: 15 Cedar Wood (25 energy for 5 portions), 18 Copper Ore (24 energy for 6 portions), and 10 Rainbow Dust (12 energy for 2 portions) to the south and west, repairing the bridge (see #13 above) along the way
- Craft the Serenade Flute at the Temple using the above materials (10 minutes) and give it to Anila

- Make your way to the northwest to find the Nightingale
- Meet three swans near another broken bridge; feed them wheat using spinners on each bird (20 wheat per spin, 200 points per spinner)
- Fix the bridge (same materials as above)
- At the Nightingale’s location explore to find 12 Rose Seeds (2 seeds for 20 energy)
- Explore to find the Rose Pot and plant the seeds in it in 2 stages: 1st=6 Rose Seeds, 5 water, 10 sand; 2nd=6 Rose Seeds, 10 water, 150 twigs
- Collect 24 roses and place them in water (2 water and 2 minutes per rose)
- Give the roses to the Nightingale to collect 12 musical notes from its song (6 at a time with 5-minute cooldown)

- At the Wind Coffer play the melody from the nightingale – 4 at a time – and the Coffer opens to provide the Air Crystal
- Accept the crystal and return to the Village; give it to Gerry for placement in the Purple Stone
This completes the Cloud Realm stage.
Back to top of Area Quests List
Willy’s Mansion Quests
- Head northward to the mansion’s gates
- After meeting Uncle Willy go through the main gates (15 energy) and head northwest to the Gazebo
- The Gazebo is in bad shape; explore to collect the 5 scattered Parts (10 energy each) and fix the structure in 3 stages: 1st=3 saws, 5 fire, 2 flooring; 2nd=6 beams, 6 screws, 5 Gazebo Parts; 3rd=2 stools, 1 desk, 6 tiles

- Repair the fireplace/oven in 3 stages: 1st=7 gravel, 6 plywood, 15 sand; 2nd=3 cement, 3 bricks, 2 chains; 3rd=1 desk, 15 fire, 30 small coal
- To make some biscuits explore to collect 6 apples and gather 1 portion of honey from the beehives (uses a spinner, 10 energy per spin, 100 points needed)


- Make 2 Apple-Honey Biscuits in the Oven using 3 apples, 3 honey, and 4 dough each
- Uncle Willy walked away – find him near the mansion’s front steps, then head around the right side of the building to look for his missing front door key
- No key but there is a side door into the mansion – 15 energy to enter it

- Sit down with Willy and eat the Biscuits then start removing the infesting vines
- Encounter the broken Grandfather Clock and restore it by finding the 3 missing parts, then repair it in 2 stages: 1st=1 Clock Hand, 3 planks, 2 glue; 2nd=2 Gears, 3 hammers, 4 screws
- Track down Willy again: take the secret entrance to the Library behind the Clock (15 energy) and then remove the blocking boulder (10 energy); finally remove the vines from in front of the door
- Find the missing Stone/Artifact in the southeast part of the mansion and glue it back on the statue (3 glue required)

- In the library search for the missing Notebook and then give it to Willy
This completes the Willy’s Mansion stage.
Back to top of Area Quests List
Haunted Forest Quests
- Follow the whisper to the Enchanted Tree
- Investigate the Tree – (15 energy)
- Build the Camp – 3 Stages: 1st=15 stones, 3 sand, 25 twigs; 2nd=3 plywood, 2 metal beams, 4 quilts; 3rd=1 sheet metal, 2 fire, 2 water
- Find out more about the curse – travel to field of wisp flowers
- Search for and collect 9 wisp flowers (9 energy each)
- Create the spiral with the flowers [Solve The Puzzle] – move the sections (5 energy per move); each section requires 1 to 3 moves
- After the wisps arrive follow them to the Melody Tree and play the melody (tap on the tree 3 times) (requires 13 then 16 then 19 energy)
- Collect three portions of the Special Haunted Forest Wood to make a Conga drum (15 energy each)
- Craft the Conga using 3 glue, 3 saws, and the 3 pieces of wood (takes 15 minutes)
- Travel to the Old Stone Circle and repair it in 3 stages: 1st=15 gravel, 3 sand, 25 stones; 2nd=3 mortar, 4 trowels; 3rd=4 bricks, 3 tiles, and the First Melody from the drum
- Travel to the Glowing Pond and restore it in 3 stages: 1st=1 flooring, 1 modular wall, 5 screws; 2nd=1 sheet metal, 5 gravel, 100 long grass; 3rd=3 paper, 2 glass jars, Second Melody from drum
- Travel to the Luminous Glade and free the mushrooms ring in 3 stages: 1st=5 saws, 1 can, 25 twigs; 2nd=10 pig feed, 10 water, 10 sand; 3rd=Third Melody from drum
- The Guard (Flora, the Wood Guardian) is awakened from the curse; provide her with water (1) and make a Cake Box in the camp: 3 strawberry pies, 3 pumpkin pies, 3 ice cream cakes (takes 15 minutes)
- Travel to the Little Tree and Take Care of it using 3 saws, 5 pig feed, and 5 water
- Flora states that a Key lies within the depths of the Gloomy Swamps (the next Stage) – this completes the Haunted Forest stage
Back to top of Area Quests List
Gloomy Swamps Quests
- Repair the campfire (optional) – 2 stages: 1st=10 stones, 20 twigs; 2nd=5 softwood, 2 fire
- Create a Standing Torch – 3 stages: 1st=1 metal beam, 2 screws, 2 threads; 2nd=1 pipe, 1 can, 2 yarn; 3rd=1 glue, 15 twigs, 3 fire; NOTE: you will need a total of 9 Standing Torches to complete this map
- Clear the path of vines and other obstacles – this route requires a lot of energy
- Create a second Standing Torch (same resource requirements)
- And create a third Standing Torch
- Discover the couple standing on top of their sinking pickup truck and help them

- Build a workbench in 3 stages: 1st=1 flooring, 2 beams, 4 mortar; 2nd=7 screws, 5 glue, 2 tiles; 3rd=4 pipes, 5 paper, 4 planks
- Collect the 7 stands of Jute (including creating another Standing Torch along the way with the same requirements) by cutting down the stands of Jute (get 3 Jute for 15 energy per stand)

- Use the Jute fiber to create two ropes (7 Jute, 7 threads, and 20 minutes per rope)
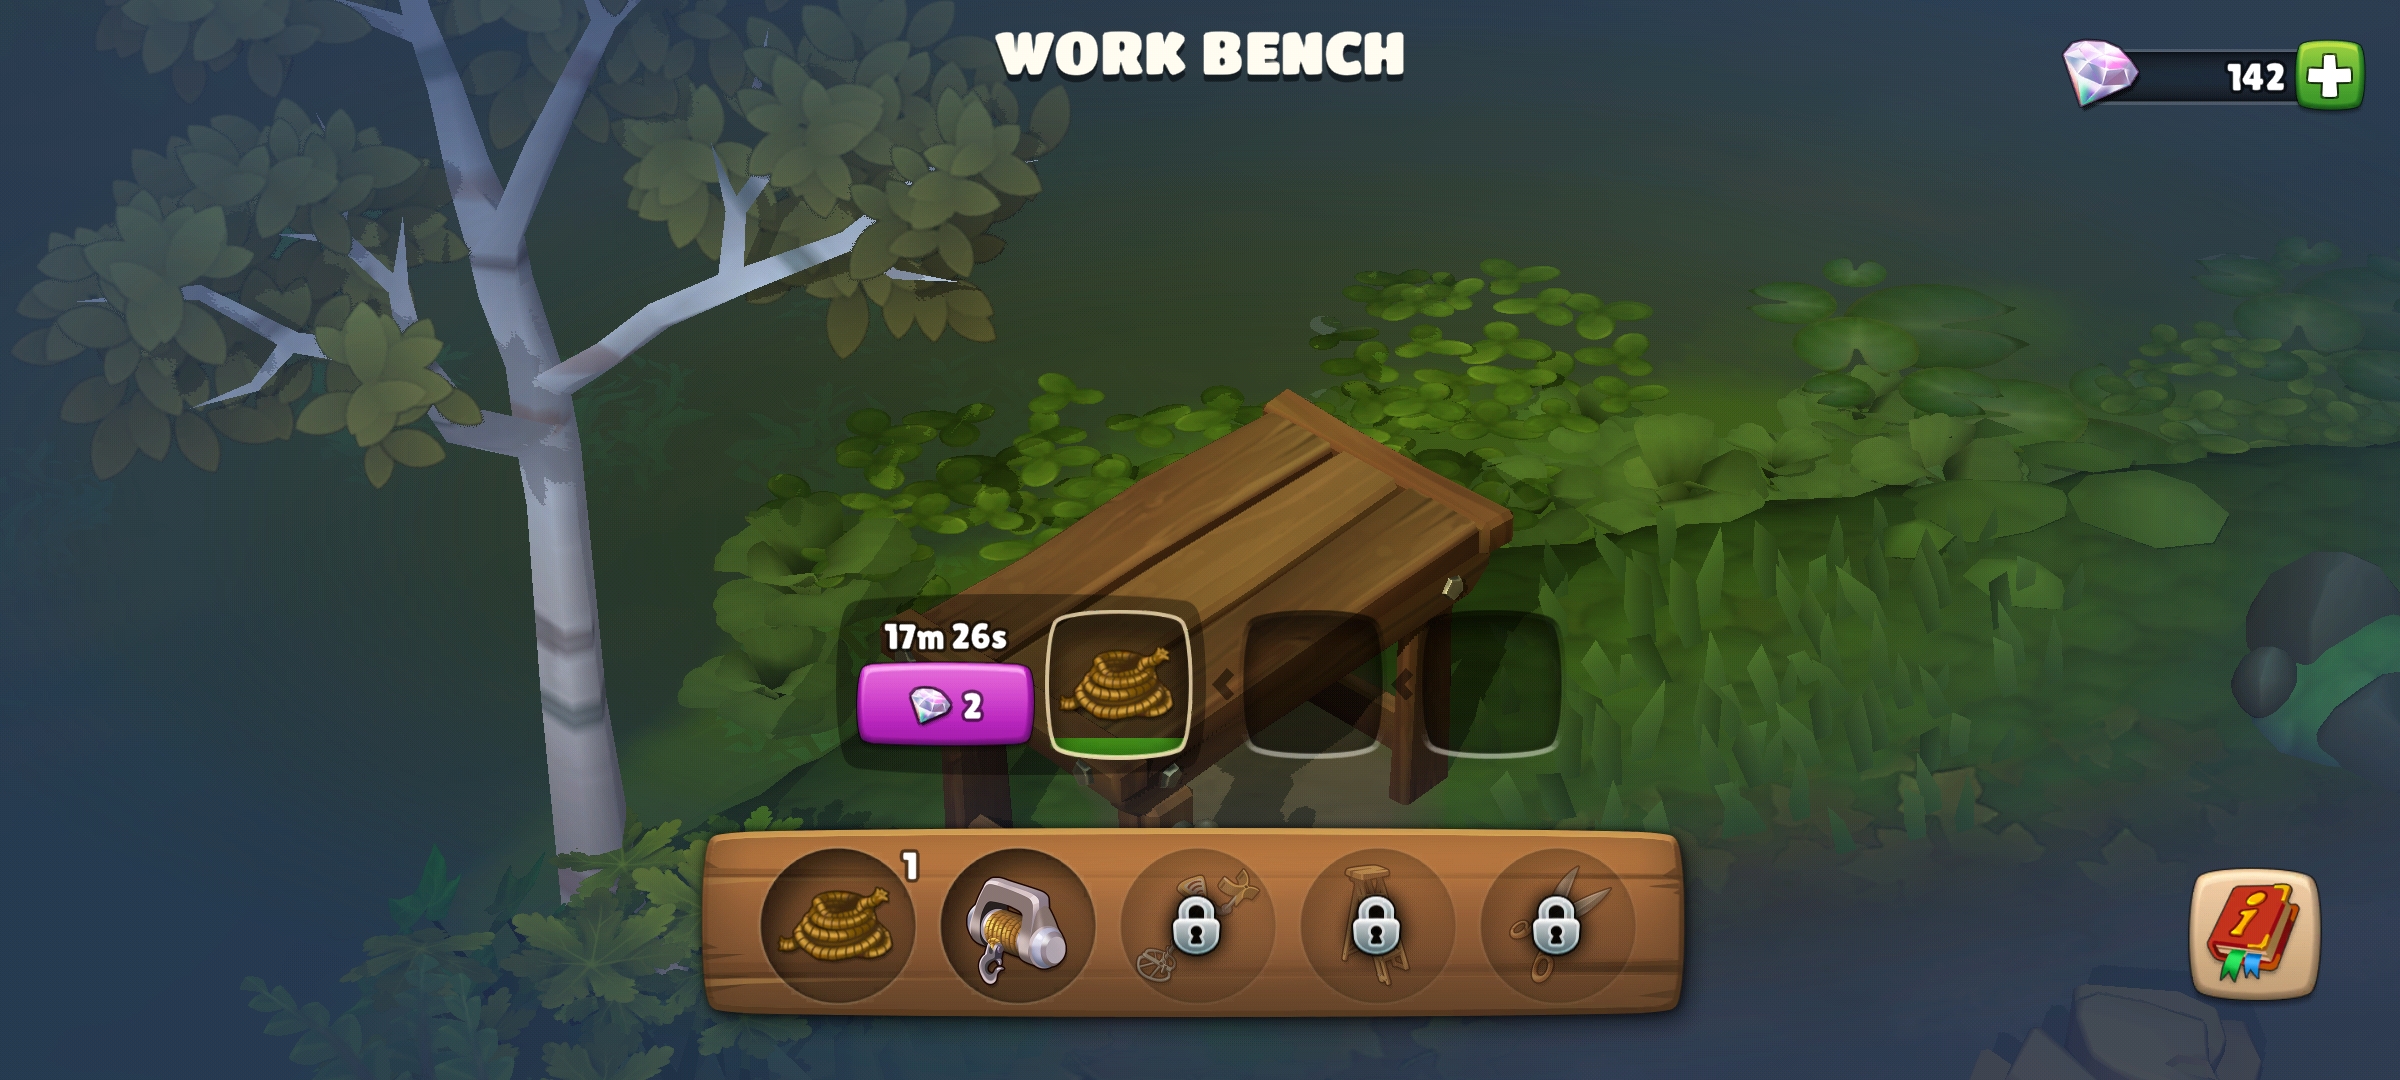
- Create a winch using 2 ropes, 15 screws, and 5 sheet metal (20 minutes)
- Explore to find a tree with which to attach the rope (make another on the workbench), then attach the winch to the truck to drag it out of the swampy area; you’ll receive a walkie-talkie from the saved couple as a reward

- Explore northeast; make another Standing Torch to repel the gloom, and find a broken metal detector (also called a “Metal Thing”)
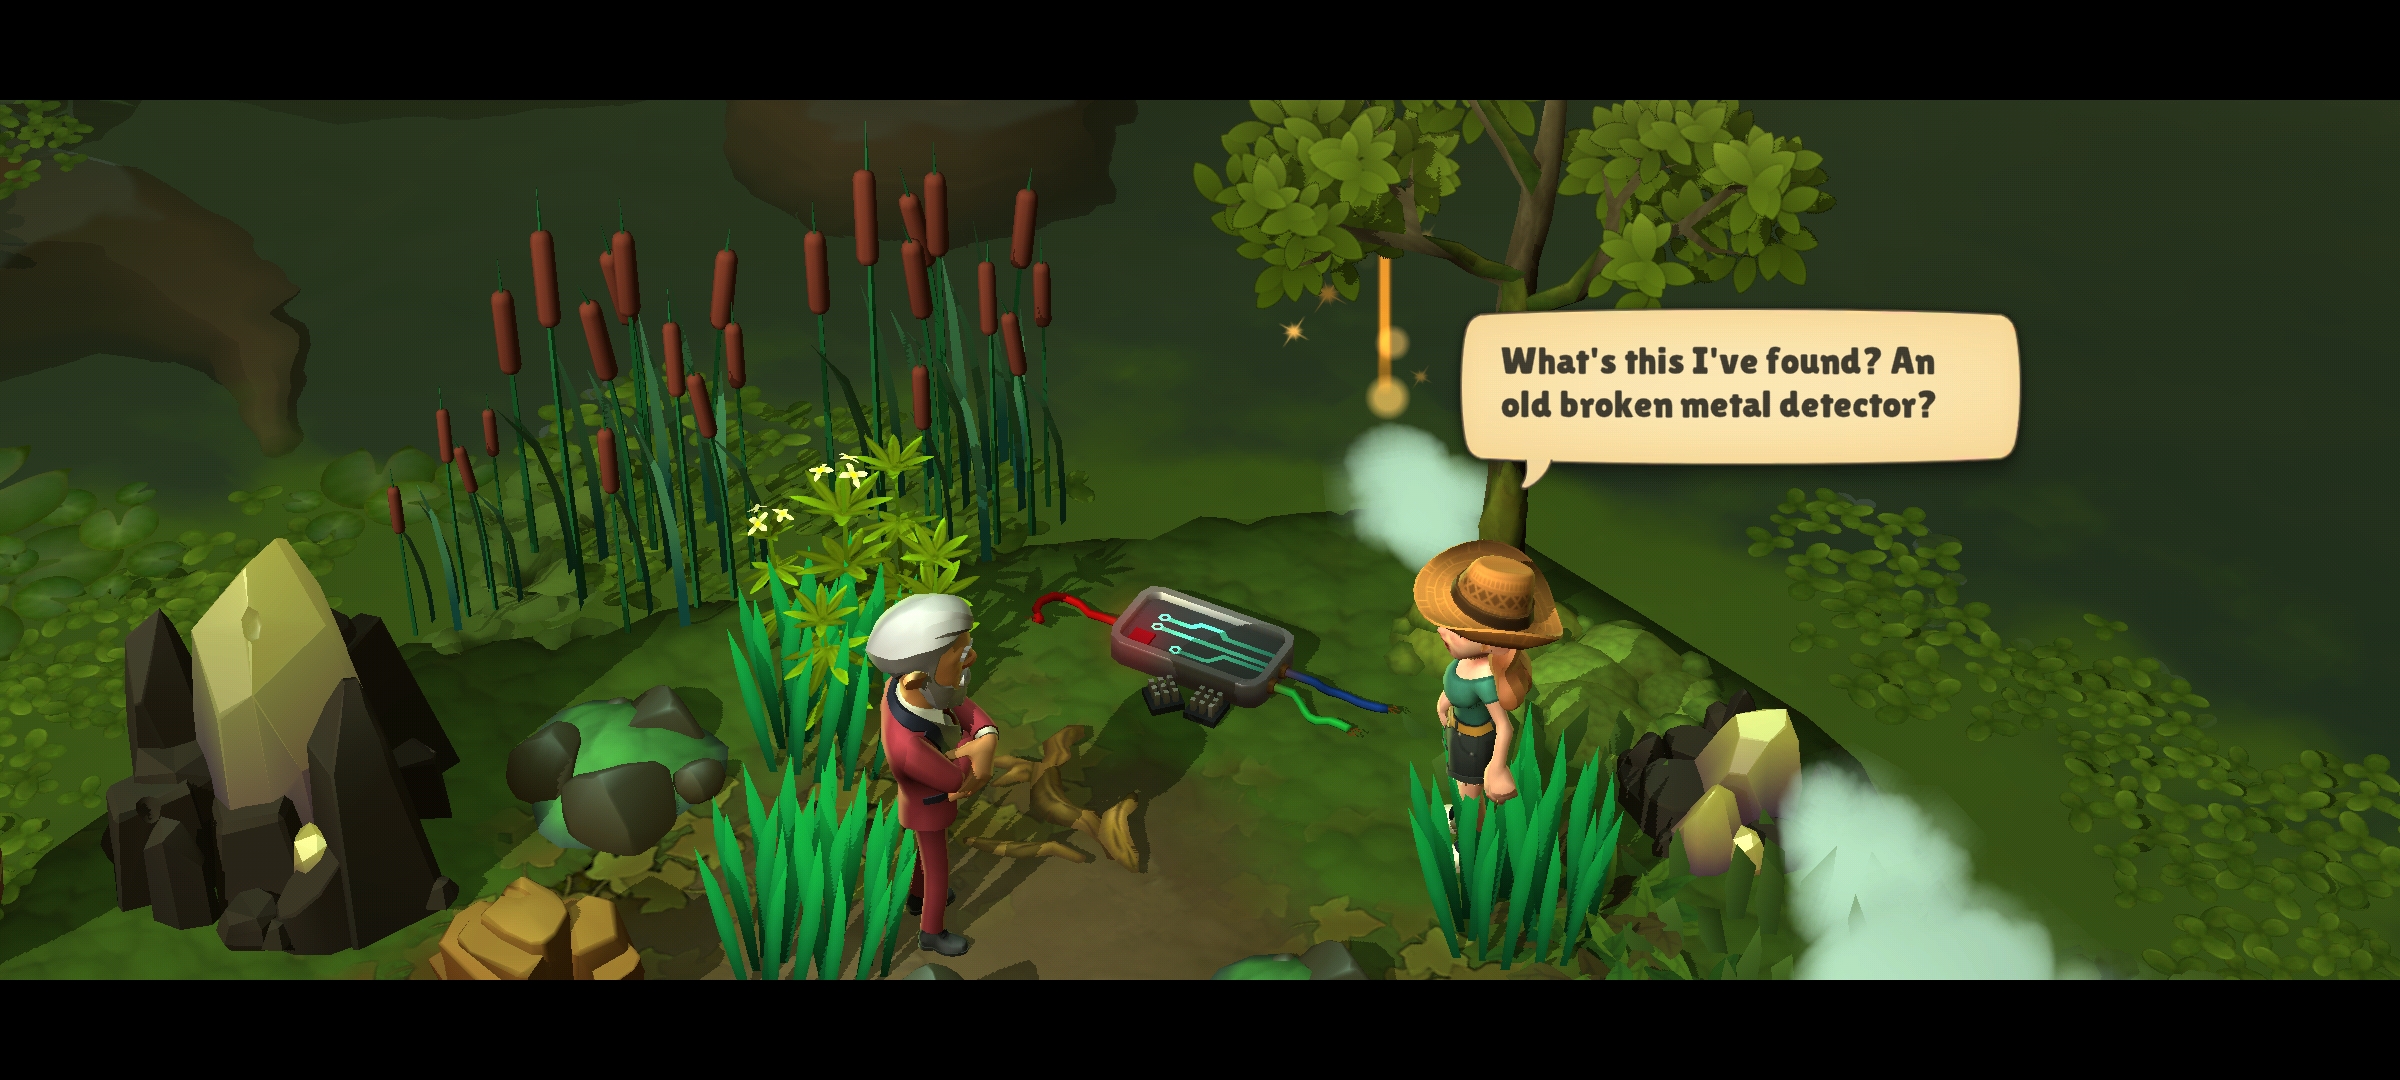
- Back at the workbench craft an operational metal detector using the Metal Thing, 9 pipes, and 5 glass
- Explore southeast, create a Standing Torch along the way, and encounter the 3 frogs
- Explore to find 3 swarms of 5 flies each: use a spinner to capture them (10 energy per spin, 100 points total per swarm)
- Use the flies to pass by the frogs using spinners for each (5 flies per spinner required)
- Continue to the swamp and construct the plank bridge in 3 stages: 1st=2 flooring, 20 hardwood, 5 planks; 2nd=8 screws, 4 beams, 10 sand; 3rd=10 saws, 15 plywood, 5 glue

- Continue southeast, create a Standing Torch along the way, and reach the pond with the giant key in the center
- Call the couple with the walkie-talkie and then move to the west and south for better reception
- Get past the 3 crocodiles using spinners (10 energy per spin, 150 points total)

- Swing back north and then southeast again to the “winching spot” to meet the truck
- Hook up the winch and rope to the key and pull it out of the water in 3 stages of energy usage: 25, 35, and 45 (total of 105 energy)
- Look for lost Great Uncle Willy heading northwest, do another Torch, and free the stuck Heron using energy in 3 parts: 25 + 35 + 45

- Continue north to find Willy hanging upside down via a tree vine; free him by using the workbench to craft a ladder using 10 screws, 15 glue, and 15 beams and also craft a pair of scissors

- Use the ladder and scissors to cut Willy down from the tree and head southeast down the narrow valley, making another Torch along the way, to meet the couple and their truck with the Key
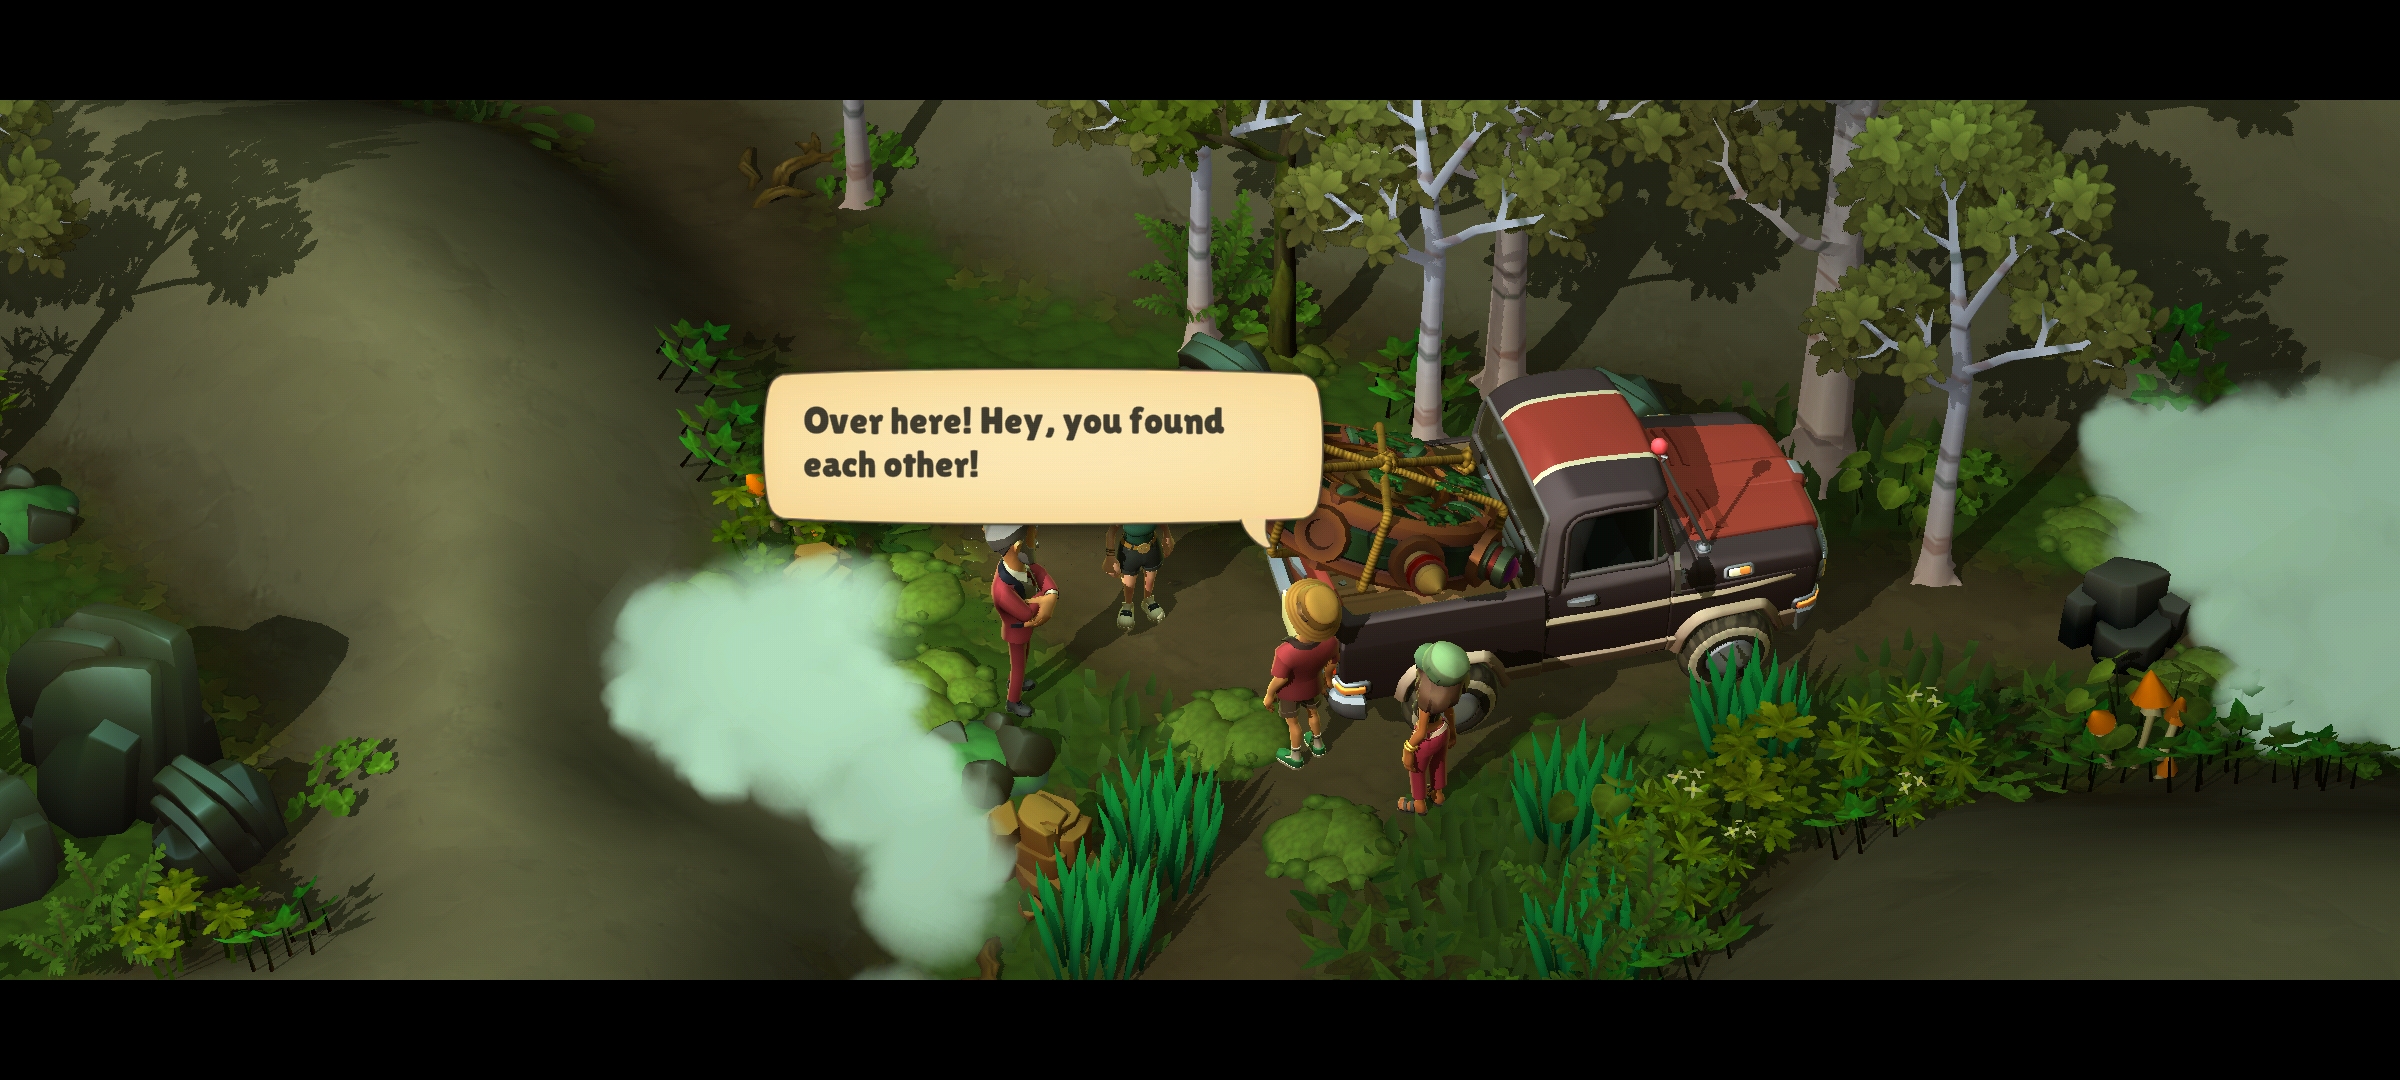
This completes the Gloomy Swamps stage of the game
Back to top of Area Quests List
Gearforge Village Quests
- Explore northeast and build a campfire using 5 stones, 10 twigs, 5 softwood, and 2 fire
- Head southeast to find the nearest gas station then begin to repair the gas pump
- Find 1 rubber hose (15 energy to collect it) and a pump (also 15 energy), then repair the gas pump in 2 stages: 1st=1 metal beam, 2 screws, 2 threads; 2nd=1 rubber hose, 1 pump, 2 pipes
- Encounter the broken electric generator and repair it in 3 stages: 1st=5 cement, 2 screws, 2 pipe; 2nd=1 glue, 2 cans, 2 mortar; 3rd=2 glass jars, 2 tiles, 1 window
- Find the empty petrol can (15 energy to pick it up) and fill it up at the gas pump
- Return to the campfire with the gas and then search for Leo, the mechanic, to the south
- Leo’s garden needs work so head south to the 3 garden plots, collect the 3 portions of seeds (15 energy each), and restore the plots in 2 stages each: 1st=1 saw, 20 twigs, 2 fire; 2nd=1 seeds, 2 water, 2 sheep feed
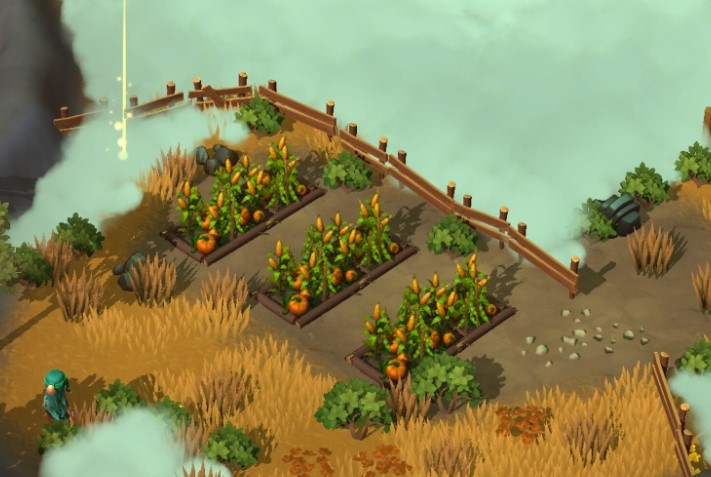
- Repair the workbench in 3 stages: 1st=1 flooring, 2 beams, 4 mortar; 2nd=7 screws, 5 glue, 2 tiles; 3rd=4 pipes, 5 paper, 4 planks
- Create a bird bath Fountain Nozzle on the workbench using 2 screws, 3 sheet metal, and 1 can
- Restore the Bird Bath in 3 stages: 1st=2 bricks, 2 mortar, 2 tiles; 2nd=2 glue, 3 pipes, 4 yarn; 3rd=1 Fountain Nozzle, 15 water, 15 grass
- Leo’s cat (Vinci) needs warmth to come home so, first create an Exhaust Pipe on the workbench using 2 pipes, 5 glue, and 3 sheet metal
- Repair the warming Oven in 3 stages: 1st=5 tiles, 2 mortar, 2 trowels; 2nd=5 planks, 1 glue, 2 screws; 3rd=1 Exhaust Pipe, 15 twigs, 3 fire
- Next make a Scratching Post on the workbench using 3 beams, 12 yarn, and 2 quilts
- Build the Cat Castle in 3 stages: 1st=1 flooring, 1 Scratching Post, 2 plywood; 2nd=4 planks, 1 sand, 2 screws; 3rd=4 paper, 1 modular wall, 3 cement
- The cat is really missing so head northwest to search for him; you’ll need to look in 3 different places until you find him
- The cat’s stuck up a tree so go to the workbench and create a ladder using 5 plywood, 10 screws, and 2 beams

- Rescue the cat and then speak with Leo
- Go back to the truck and discover that the couple driving it are missing; search and find both but you’ll need to restore a broken bridge in 3 stages: 1st=1 flooring, 2 bricks, 2 mortar; 2nd=4 planks, 2 bricks, 2 gravel; 3rd=1 beam, 2 bricks, 2 gravel

- Back at the truck pick up the giant key artifact using energy (20 + 15 + 10) and place it on the workbench
- Leo examines it and needs some parts/tools to fix it – search eastward for the 3 items (15 energy each to pick them up)
- Collect the 3 Parts and give them to Leo
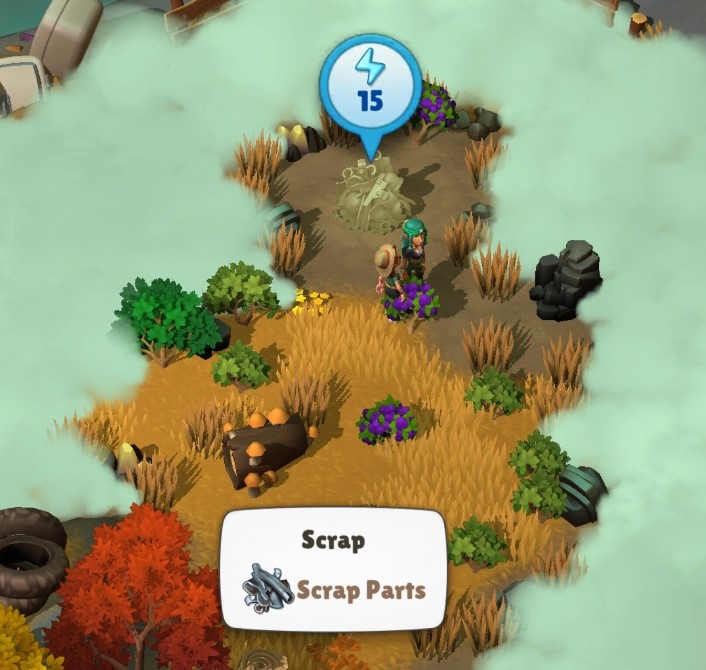
- Leo gives you information about the key, then load the key back onto the truck (20 + 15 + 10 energy)
- Drive the truck down the road until you encounter a “good luck” deer; use a spinner (10 energy per spin, 100 points total) to get past the deer

This completes the Gearforge Village stage.
Back to top of Area Quests List
Waterfall Whispers Quests
1. Search for the Waterfall and rebuild the bridge using 1 Flooring, 20 plywood, and 15 yarn
2. Search to the south, encounter Favian, and follow him to the big key-shaped slot in the Antique Gate
3. Go back and pick up the Artefact Key; using 15 energy insert it into the slot and watch the pretty colors appear

4. Click on the Key to open the gate using 45, 35, and 25 energy
5. Inside the gate clear the debris using 30 energy and continue on to the plaza
6. The large mural wall is missing a portion so start searching the area

7. Another bridge needs repairs in 3 stages: 1st=3 beams, 6 screws, 2 sheet metal; 2nd=4 pipes, 6 planks, 3 glue; 3rd=2 chains, 4 bricks, 3 cement
8. Remove the vines from the Wood Guardian statue using 25 + 20 + 15 energy; the base reads: “Under the sun’s gaze, the forest finds it breath.”
9. Follow the Sunlight Wisp to the Old Tree; feed the tree with 5 fertilizer and 5 water; rotate the four mirrors to focus sunlight on the tree (5 energy per rotation) and receive the Sunlight Essence
10. Collect the Essence and apply it to the Wood Guardian statue; a beam of light shines towards the missing mural location
11. Go north to the next statue, the Water Guardian, remove the sand from the base using 25 + 20 + 15 energy; the base reads: “Parched like desert sands, we ache for the oasis of the roaring bends.”
12. Head north close to the waterfall and follow the Spirit Wisp to the dried, sandy pool containing turtle eggs; remove the sand using 45 + 35 + 25 energy
13. Restore the pool by creating an aqueduct using 10 pipes; each one requires screws, twigs, and planks; 7 straight pipes (2 screws, 2 twigs, 1 plank each), 4 curved pipes (2 screws, 3 twigs, 1 plank each), and 1 T-form pipe (2 screws, 4 twigs, 2 planks) [a total of 24 screws, 30 twigs, 13 planks]
14. Rotate the pipes using 12 energy each time

15. The turtle creates the Spirit Essence; collect it using a spinner (10 energy per spin, 100 points required) and apply it to the Water guardian statue
16. Walk to the third statue – the Earth Guardian – and clear the roots from the base
17. Find the Green Wisp and then collect 15 mushroom spores (15 energy for every 3 spores)
18. Remove the broken wall obstacle using 15 + 25 + 35 energy; rebuild the mushroom farm by repairing the 5 raised beds with each having 2 stages: 1st=3 beams, 6 screws, 5 sand; 2nd=3 spores, 8 water
19. Go toward the Fire Guardian statue’s location but repair another bridge in 3 stages: 1st=3 beams, 6 screws, 2 sheet metal; 2nd=4 pipes, 6 planks, 3 glue; 3rd=2 chains, 4 bricks, 3 cement
20. The statue is in disrepair so fix it in 3 stages: 1st=3 bricks, 2 glue, 4 sand; 2nd=4 cement, 5 gravel, 4 paper; 3rd=3 mortar, 3 water, 5 tiles
21. Head south to the Fire Bowl and then break through the blocking wall using 15 + 25 + 35 energy
22. Repair the Fire Bowl in 3 stages: 1st=3 modular walls, 3 sheet metal, 4 glue; 2nd=5 bricks, 35 grass, 4 sand; 3rd=30 small coal, 4 beams, 5 fire; receive a Fire Essence
23. Re-energize the 3 fire wisps using spinners for each: 1 fire per spin, 100 points per wisp; they produce a Fire Essence; apply an Essence to the statue (the other will be needed later)
24. Travel to the Air Guardian statue; raise it back up using 25 + 20 + 15 energy
25. Head to the Old Library and spend a lot of time and energy collecting 9 Flying Pages, assembling them into 6 Books, and placing those on the Shelves; receive the Air/Knowledge Essence and apply it to the statue

26. The next location is missing its statue so create one on a workbench
27. Build a small forge in 3 stages: 1st=2 flooring, 10 sand, 15 gravel; 2nd=2 modular walls, 10 bricks, 20 mortar; 3rd=25 iron bars, 5 fire, 3 quilts
28. Collect 3 portions of Pinkerium Ore (15 energy per portion) and forge 3 ingots using 1 Ore, 2 fire, and 3 clay for each
29. Collect 3 Metal Body Parts and rebuild the Shattered Statue in 3 stages: 1st=1 metal body part, 5 screws, 2 glue; 2nd=1 metal body part, 3 pipes, 4 yarn; 3rd=1 metal body part, 5 cement, 2 metal beams
30. Receive the Love Essence and use it to refuel the Metal Guardian statue
31. Create an explosive powder o the workbench using the 2nd fire essence, 20 coal, and 15 sugar, then create the bomb using the powder, 5 tiles, and 5 yarn
32. Apply the bomb to the massive rockfall, collect the Growth Essence and use it on the Earth Guardian statue
33. Back at the plaza remove the vines from around the missing mural portion

34. Travel the for southeast and pick up the missing Middle Piece using a spinner (10 energy per spin, 100 points total needed) and then place it in the mural
35. Build a tent in 3 stages: 1st=1 flooring, 4 pipes, 2 beams; 2nd=4 quilts, 6 yarn, 2 chains; 3rd=6 pickles, 2 dresses, 6 fruit preserves, and wait until nightfall
36. A robed figure in purple appears on the mural; return to the Village and tell Grandpa about it

This completes the Waterfall Whispers stage.
Back to top of Area Quests List
Timed Stage User Journey Areas (TSMs)
These moderate-sized areas are occasionally provided to the player to generate income, collect resources, and receive awards and medals (for completion). They last only 7 days so actions have to be highly focused to complete them within that time limit.
Note: Sometimes the Hint Arrow may be a bit off the mark. If you keep getting “Not Available” when selecting a quest, try moving your character on the map to the area at or near the last quest, then tap the new, desired quest – it should then show the correct hint location(s).
Fayewald (TSM #1)
![]()
- Find Albert to the north
- Find the 5 scattered gears (15 energy each)
- Go back and repair the workbench – 2 stages: 1st=4 plywood, 2 saws; 2nd=5 chains, 3 hammers, 20 wood
- Repair the gears on the workbench – each requires 1 gear, 3 iron bars, and 2 minutes
- Fix the rainwater Reservoir – 2 stages: 1st=5 gears; 2nd=5 screws, 10 iron bars, 5 water
- Clear 5 water puddles for Erin (5 + 3 energy each)
- Remove the blocking fallen tree to reach the Weather System
- Collect the 8 Machine Parts (40 energy per crate, each containing 2 parts)
- Repair the Weather System – 2 stages: 1st=4 machine parts, 4 plywood, 1 saw; 2nd=4 machine parts, 20 softwood, 4 gravel
- Remove the blocking boulder and go northwest to the Workstation
- Collect 4 fabric from spiderwebs (12 energy each)
- Repair the Workstation – two stages:1st=2 fabric, 2 hammers, 4 beams; 2nd=2 fabric, 4 plywood, 3 sheet metal
- Collect 10 moss for a new home for the foxes (34 energy per 2 moss)
- Build a Fox Home in 2 stages: 1st=10 wood, 1 saw, 5 moss; 2nd=10 softwood, 15 grass, 5 moss
- Collect 6 Special Leaves (20 energy needed per maple leaf tree) and 9 Forest Fruits (15 energy per fruit cluster) to make potions for the distressed bears
- Restore the Campfire in 2 stages: 1st=15 stones, 20 twigs; 2nd=5 wood, 5 softwood, 5 fire
- Make 3 healing potions in the Campfire; each requires 2 leaves and 3 fruits (10 minutes)
- Apply the potions to the 3 bears along with 5 water and 3 grass each
- Head northwest to the bee’s area and fix the beehive using 3 screws, 5 planks, and 2 glue
- Find 2 bee swarms and collect them using spinners (100 points needed, 10 energy needed per spin)
- Head south, remove the blocking boulder, and continue to the Pond
- Find the 7 pieces of tubing for the water purifier northwest of the pond (25 energy each)
- Repair the Water Purifier in 2 stages: 1st=7 tubing, 3 screws; 2nd=10 water, 10 planks
- Remove the fallen tree barrier to the northwest and collect 15 Bearberries (12 energy each) and lure the bears to the pond with 3 piles of them
- Survey the forest with Erin and then restore the Bench (1 screw, 2 cement, 1 beam) and the Lamp Post (1 System Part [made back on Workbench with a Copper Screw found nearby and 2 metal bars] and 1 Sheet Metal in 5 minutes)
- Head north to the Bridge over the river – repair it in 2 stages: 1st=3 beams, 3 twigs, 5 gravel; 2nd=7 hardwood, 5 sand, 2 screws
- Cross the bridge and find 30 Flower Seeds (20 energy per 2 Seeds) and 20 Plant Minerals (20 energy per 1 Mineral)
- Replant the Flower plots in groups of three in 3 stages each: 1st=6 Seeds, 2nd=4 Minerals; 3rd=10 water
- Travel west to the Quicksand Pits and fill both in 2 stages: 1st=4 gravel, 5 stones; 2nd=3 grass, 10 twigs
- Find the Scared Rabbits – make 2 Soup (2 minutes each) for them by collecting 4 Wild Carrots, and fixing the Stove
- Feed the carrots to the two rabbits; this completes the major quests for Fayewald
Back to top of Area Quests List
Captain’s Cay (TSM #4)
![]()
- Find the Captain’s Lost Goods – travel northwest to the broken crate
- Repair the Campfire – go west to find the campfire – 2 stages: 1st=10 stones, 20 twigs; 2nd=10 softwood, 2 fire; Note: you can also use the campfire to make mushroom soup and blueberry syrup for more energy
- Collect 6 Pink Fruits and 6 Green Fruits – remove the blocking boulders (12 energy each) and then collect the fruits (12 energy each)
- Collect 6 bottles for the fruit juice – remove the blocking boulder (12 energy) and then collect the bottles (9 energy each)
- Put the fruit in the kettle on the campfire and cook it, put the juice in the bottles, and the bottles in the left-most crate
- Explore to meet the Captain’s Old Friend – remove the blocking boulder and continue to the northeast
- Repair the Workbench – 3 stages: 1st=3 plywood, 1 saw, 3 gravel; 2nd=2 planks, 2 screws, 1 hammer; 3rd=2 pipes, 5 hardwood
- Use the fishing rod to get the Captain’s half-sunken chair out of the ocean – uses a spinner with each spin requiring 10 energy (100 total)
- Collect 8 bamboo (15 energy each) from the valley to the northwest of the dock after removing the boulder
- Create 4 spools of Bamboo Yarn on the workbench, then fix the Captain’s chair on the workbench using the spools (10 minutes)
- Head south in the valley, remove the boulder, and collect 5 portions of Tungsten Ore (18 energy each)
- Continue in the valley, headed north, and collect 6 portions of Royal Palm Tree wood (23 energy for one tree = two portions)
- Repair the chair again on the workbench using the ore and wood (10 minutes), and place it in the middle crate (along with 10 grass as packing material)

- Move northeast in the valley to pick up the Treasure Map which directs the reader to a “strange noise” in the maze to the northwest
- Head to the maze, removing any obstacles along the way
- Encounter the first blue wisp (the noise maker) and use a spinner to pass by it (10 energy per spin, 100 total)
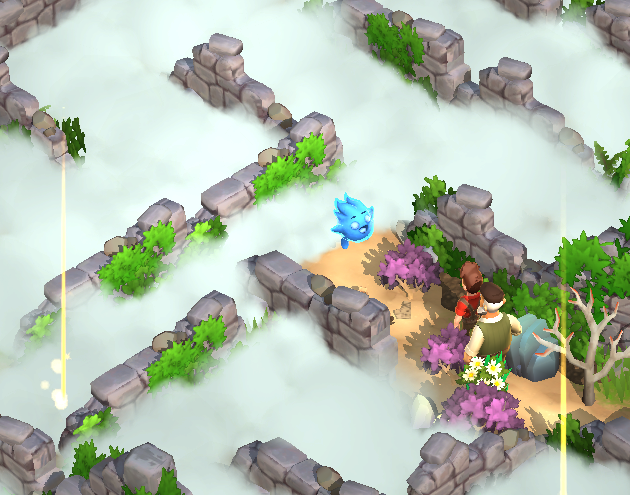
- Continue in the maze to the location of the Treasure Chest
- Search for two shovels to dig out the chest (19 energy each), removing the blocking boulders as needed

- Did out the chest in 2 stages: 1st=1 shovel, 5 twigs; 2nd=1 shovel, 5 stones
- Head south to the “North” Beach and observe the shark with a compass on its back
- Go back to the dock and use worms to catch 5 fish (5 minutes each)

- Feed the fish to the shark and get the compass
- Explore to find the compass’ Needle in the Toolbox (25 energy to open it)
- Explore to find and collect 3 scattered Gears for the compass (18 energy each)
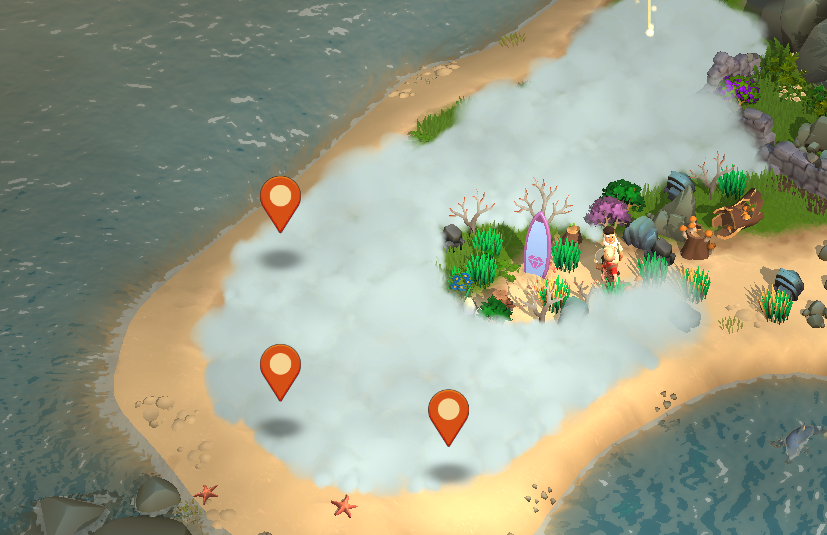
- Repair the Compass on the Workbench (10 minutes) and then place it in the last crate (with 20 grass)
This completes Captain’s Cay – if you have time left you can continue to explore the island and collect resources
Walden Grove (TSM #3)
![]()
- Help Leon the Mailman to recover the missing delivery packages by heading north to find clues (feathers) from the culprits
- Travel north removing the obstructions: 3 wood (15 energy each) and 2 thorns (25 energy each)
- Continue north past the boulder (12 energy) to gather 3 portions of wild seeds (10 energy each) for the stressed chickens

- Find the Workbench and repair it in 3 stages: 1st=4 plywood, 2 hammers; 2nd=2 planks, 3 screws; 3rd=2 water, 3 gravel
- Optional: repair the Jam Cauldron using 1 saw, 2 Forest Glimmer plants (collect using 15 energy each), and 10 stones
- Optional: use picked wild berries (requires 6 energy per bush = 2 berry portions) to make energy jam batches in the cauldron – each batch requires 15 berry portions to create 30 energy; Note: if you just gather berries for the cauldron (8 bushes = 48 energy required) rather than removing the bushes as obstacles as part of your needed exploration for other quests you will actually lose energy making the jam (+30-48 = -18)
- Create 3 portions of Special Chicken Food on the workbench using the seeds (10 min per batch), then feed the chickens the 3 portions along with 4 twigs, 3 water, and 4 grass to get the 3 stolen damaged packages back – picking them up takes 5 energy each
- Explore to the east past the boulder to find 6 sheets of cardboard (requires 10 energy each) and 6 rolls of packing tape (requires 20 energy each) to repair the packages
- Repair the 3 packages on the workbench using 1 damaged package, 2 rolls of tape, and 2 sheets of cardboard each (10 minutes each) and then deliver them to Leon
- Head to the far east (past a boulder) to the Cave to look for lost letters
- Encounter the swarm of bats (much like the ones in “Ruins of Villaris”) and to get past them you’ll need to collect 3 portions of silk (from Silky Bushes – 7 energy each), craft 3 Bat Nets on the workbench (5 minutes each), and catch the bats
- Build the new Bats’ House in the nearby tree in 2 stages: 1st=3 saws, 3 more bat nets (need more silk to create the nets on the workbench), 2nd=3 hammers, 20 twigs, 3 planks

- Remove the boulder in front of the cave (12 energy) and then pick up the Letter (5 energy)
- Head north and west to find the remaining 3 letters for this quest and then deliver them to Leon

- Repair Leon’s Mailbag in 2 stages: 1st=2 fabric (collect spiderwebs nearby [12 energy each], 3 grass; 2nd=4 Waldon Grove Silk (from bushes nearby), 3 water
- Head north into the neighborhood to track down Greta’s Letter
- Optional: repair the Well along the way in 2 stages: 1st=7 Forest Glimmer plants, 20 stones, 2 plywood; 2nd=1 trowel, 5 grass, 10 twigs (produces water)
- Explore to find the 4 missing parts for the Mailboxes and collect them (requires 15 energy each), and repair each one on the workbench (1 mailbox part, 2 planks, 2 screws, 10 minutes)

- Rebuild the 4 mailboxes using 3 planks, 1 mailbox part, and 2 screws each
- Continue exploring northwest clearing obstacles along the way into the other neighborhood to find Greta’s Letter and pick it up (10 energy)

- Find Greta and deliver her letter (a Happy Birthday Card from her grandson)
- Repair the other 4 mailboxes in this neighborhood using the same process and resources as before
- There are now just two more quests to complete to obtain all of the rewards in Walden Grove and the Golden Mailbox: 1) find and deliver the 15 missing letters scattered all across the area (10 energy each), and 2) feed one of the two remaining wild chickens in the northern neighborhood (collect seeds [10 energy each] and use them in a spinner (50 points required, usually acquired in 3 spins)
- You can complete the remaining tasks to get enough points to obtain the Grand prize of the Pink Daffodils (produces 300 energy): repair all 8 mailboxes, sooth all 5 chickens, clear 15 dead trees, build 5 Bat houses, find all of the letters, collect all of the wild red berries, cook the maximum amount of jam, and fix the well.

This completes TSM #3 – Walden Grove
Back to top of Area Quests List
Jurassic Gorge (TSM #5)

Note: If you keep getting “Not Available” when selecting a quest in Jurassic Gorge, try moving your character on the map to stand in the area at or near the last active or completed quest, then tap the desired quest – it should then show the correct hint location(s). [This is due to the same quests (tools, ferns, etc.) in the Stage used multiple times – the Hint engine will instead point to the nearest quest locations shown on the screen or closest to your current character’s location]
Note: Step 13 below requires a lot of water and wheat; to get a head start on it suggest you begin now growing wheat and grass, and making water from the grass
Note: You can pick up “flying keys” and use two of them to open the gold and purple chests
- Find the map – move north a short way to recover the map (takes 10 energy to pick it up) and show it to Cornelius
- Move north and west to the First Dig Site
- Collect 10 Flower Seeds in two separated areas (each seed set requires 7 energy)
- Restore the Campfire (optional) – 2 stages: 1st=10 stones, 20 twigs; 2nd=10 hardwood, 2 fire
- Collect 10 well-scattered Desert Moss (found on mossy stones; each requires 15 energy)
- Repair the workbench – 2 stages: 1st=6 twigs, 3 saws; 2nd=3 planks, 1 hammer, 3 screws
- Package up the seeds – create 5 jars (requires 10 minutes per jar) on the workbench using 2 moss and 2 seeds per each, then give the jars to Jane; while you’re waiting on the packaging you can explore the rest of the town and click on the eastern bazaar blue/gray-roofed stall for rewards
- Continue north and find the First Dig Site; collect the 6 archaeology tools (requires 10 energy each)
- Dig the Site in 3 stages: 1st=2 tools, 1 hammer; 2nd=2 tools, 1 saw, 1 plank; 3rd=2 tools, 2 screws
- Collect 9 desert ferns (12 energy each) in the area of the First Dig Site, and make 3 polishing brushes in the Expedition Camp tent (3 ferns and 1 water each, 10 minutes)
- Using the brushes polish the 3 dino bones (10 minutes each)
- Head west from the Dig, remove the rock (12 energy), and speak with the bread merchant at his stall
- Find the 8 grain plots (remove the west rock in the town near the bazaar stall), plant each of the plots (in the game’s most tedious production quest) in 2 stages: 1st=20 wheat, 5 water; 2nd=30 wheat, 5 water, and harvest the grain; this quest requires a total of 400 wheat and 80 water (= 800 grass)
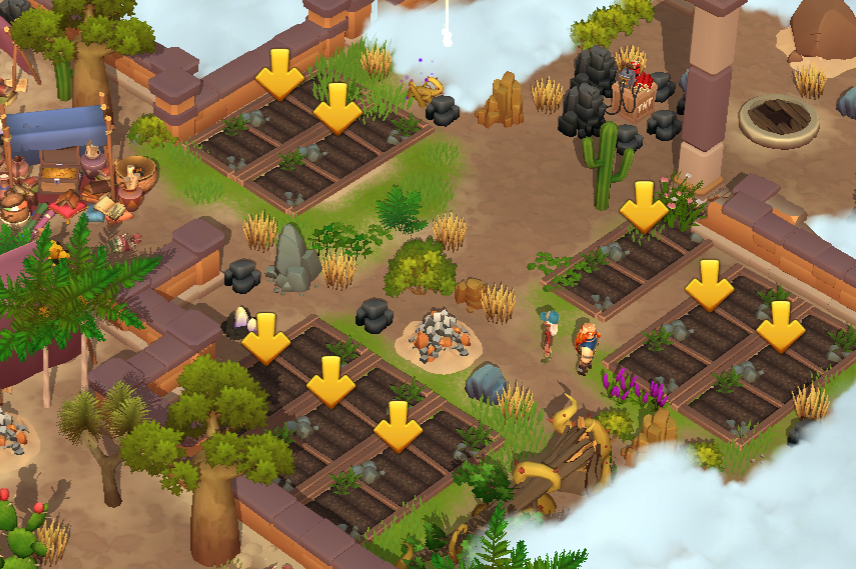
- Mill the 8 grain (10 minutes each), then make bread using 1 grain, 10 eggs, and 2 water for each (10 minutes each); this is a total of 8 milled grain, 80 eggs, 16 water
- Pack the bread into the 2 crates – each crate requires 4 bread, 2 corn, and 5 peas
- Remove the boulder to the north of the bread stall (12 energy) and head northwest to the 2nd Dig Site
- As before, collect 6 archeology tools (10 energy each) and dig out the fossils
- Remove the fallen tree blocking access to the far northwestern area , and, again collect 6 ferns from the nearby area to make 3 brushes, and then polish the fossils
- Remove the two blocker rocks to get to the 3rd Dig Site, but first encounter the Cheese Maker at her stall, and then find 5 sheep (removing another blocking rock along the way) and get their milk; each milk requires 15 wheat and 10 grass
- Make 5 cheese at the cheese stall (10 minutes each) then put them on display (requires a few eggs; don’t know why)
- Continue on by removing the fallen tree blocker then repair the broken bridge – 2 stages: 1st=3 planks, 4 mortar; 2nd=1 hammer. 3 screws
- At the 3rd Dig Site once more find 6 archeology tools (10 energy each), and then dig – 3 stages: 1st= 2 tools, 1 hammer; 2nd=2 tools, 1 saw, 1 plank; 3rd=1 tool, 3 screws
- Remove the northern blocking rock, and, as before, collect the 9 ferns to make the 3 brushes and then polish the fossil bones
- Remove the blocking boulder and travel toward the 4th (and last!) dig site
- At the Camel Stables begin a search for 40 palm nuts in the local area which requires 25 energy per palm tree to get 4 nuts (10 trees = 250 energy)
- Make camel feed in the stable in two stages: 1st=20 palm nuts, 10 hay bales, 5 water; 2nd=20 palm nuts, 20 twigs
- Remove the southwest blocking boulder and track down the 4 missing camels; recover them using a spinner for each one (100 points per camel needed, 10 energy per spin)
- Remove the southeast blocking boulder and fix the weaver’s shop using 6 planks, 4 screws, and 1 saw
- Collect 10 fabric (requires 15 energy each) in the surrounding areas, removing blocking boulders as needed, then make 5 sets of clothing (10 minutes each)
- Remove a blocking boulder to the south and deliver the clothes
- Remove the last boulder to reach the 4th Dig Site; retrieve the 6 tools and dig – 3 stages: 1st= 2 tools, 1 hammer; 2nd=2 tools, 1 saw, 1 plank; 3rd=1 tool, 2 screws
- Collect the 9 ferns to make the 3 brushes and then polish the last 3 fossil bones
- Deliver the 12 polished fossils to Cornelius; this completes the main quest for Jurassic Gorge
- If you still have time left in Jurassic Gorge you can continue in the area and complete the additional tasks available by tapping on the colorful crate in the lower left corner of the screen
Back to top of Area Quests List
Sunrise Village Estate (TSM #6)
![]()
Note: The sequence of quests below is critical, otherwise you may find yourself in a frustratingly closed loop, unable to directly progress. This is especially important with the Glen’s Guitar related quests.
- Travel north through the arch to the Estate
- Clear out the blocking boulder to the east of the tent
- Find the Sugar Pearls beyond the large east gate (30 energy to collect)
- Find the Donut Iron (20 energy to collect)
- Fix the Donut Maker machine in 3 stages: 1st=4 saws, 3 trowels, 2 hammers; 2nd=1 donut iron, 4 pipes, 3 beams; 3rd=2 Sugar Pearls, 5 dough, 5 butter
- Bake a donut after collecting 6 sunflower petals (6 energy per pair) from 3 nearby sunflower beds
- Collect 4 gears for the broken Kitchen Machine in the northeast corner of the Estate (25 energy each)
- Find the mixer (20 energy) and the bowl (20 energy)
- Repair the Baking Machine – 3 stages: 1st=2 hammers, 4 saws, 3 trowels; 2nd=3 pipes, 2 Yellow Sugar Pearls (search on the other side of the hedge from the Machine, 30 energy), 5 dough; 3rd=4 gears, 1 mixer, 1 bowl
- Find 15 Dried Sunflower Seeds (20 energy per pile) behind the white gate (opens with 20 energy)
- Make 3 Sunflower Flour in the Machine from the Seeds (10 minutes) and then make 3 Dough using 1 flour, 10 eggs, and 1 water each
- Bake the cake using the 3 dough and 5 water (10 minutes) then place the cake on the table
- Head southwest though the big thorns to the Sunflower House
- Collect 1 Flower Basket (25 energy), 1 Flower Stand (30 energy), and 6 Scissors (pruning shears) (no cost) in the Hedge Maze
- Repair the Flower House in 3 stages: 1st=2 hammers, 4 saws, 3 trowels; 2nd=3 mortar, 3 pipes, 4 tiles; 3rd=1 Flower Basket, 1 Flower Stand, 6 Scissors
- Gather 24 nettles (6 plants) behind the white gate (20 energy per plant for 4 nettles)
- Craft 4 Fertilizers in the Sunflower House using 6 nettles and 1 water each (10 minutes)
- Prepare the 4 sunflower beds using 1 Fertilizer and 1 water for each
- Go north through the gate and assemble the Workbench in 2 stages: 1st=4 plywood, 2 hammers; 2nd=2 planks, 3 screws
- Find Glen’s broken Guitar (25 energy to collect it), and then head west through the gate to find the Repair Toolkit (20 energy)
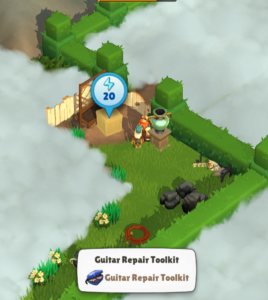
- Light the Oracle’s Beacon in 2 stages: 1st=10 twigs, 10 grass; 2nd=3 fabric (found in 3 red chests the area)
- Find materials for the Giant Chess Set: White Paint (25 energy), and Purple Paint (25 energy)
- Tap/click on the 1 brown giant chess Pawn piece to complete the “Gambit” quest (no energy cost); also, can tap/click the 3 yellow giant Pawns for rewards (no cost)

- Find the King and Queen chess pieces (no energy cost)
- Repair the Chess Field in 3 stages: 1st=50 grass, 3 mortar, and 5 trowels; 2nd=1 White Paint, 1 Purple Paint; 3rd=1 King Piece, 1 Queen Piece
- Find the Microphone for the Show Stage (20 energy) and the Plectrum (guitar pick) (no energy cost)
- Collect enough large Sunflowers (20 energy each) to create 5 Bouquets in the Flower House, 5 minutes each
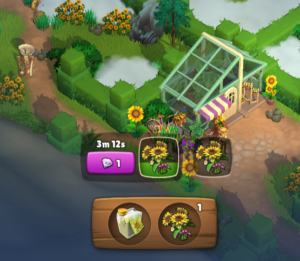
- Set up the Banquet – 3 stages: 1st=4 saw, 2 hammers, 4 trowels; 2nd=1 bouquet, 3 glass, 3 beams; 3rd=2 stools, 4 bouquets, and then get the Guitar Strings from the Oracle in the green bow-tied package next to the Oracle’s Beacon

- Repair the Guitar on the Workbench using the Broken Guitar, the Strings, and the Repair Toolkit (10 minutes)
- Set The Stage with the Guitar, Microphone, and Plectrum, and then get the Toolkit containing the Drill from Glen in the gift package next to the Stage
- Create the Tent Tools on the Workbench using the Destroyed Tent Tools, the Drill, and 5 screws (10 minutes)
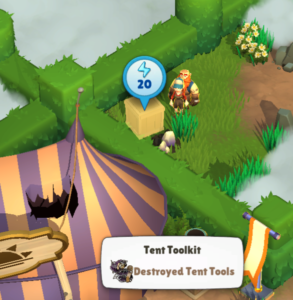
- Repair the Party Tent in 3 stages: 1st=2 hammers, 4 saws, 3 trowels; 2nd=4 tiles, 3 chains, 1 Tent Tool; 3rd=2 window glass, 1 stool, 4 balloons (found nearby)
- Place 2 bouquets (created in the Flower House) in each of the 2 Sunflower Statues by the Tent

- Complete the Helping Hands quest by collecting a green watering can (25 energy) and watering a Dried Sunflower
- Complete the Broken Birdbaths quest by collecting a Red Tube (20 energy) and fixing a Broken Birdbath in 3 stages: 1st=1 water, 10 stones; 2nd=5 quartz, 1 plywood, 1 trowel; 3rd=1 Tube
- Complete the Floral Wall quest by using 3 Bouquets from the Flower House
- Complete the Broken Bench quest by repairing one using 2 gravel, 1 trowel, and 1 Bouquet
This completes the main quests for Sunrise Village Estate (Birthday Party); you can continue repairing birdbaths, floral walls, benches, and other items as desired.
Back to top of Area Quests List
Autumn Fair (TSM #7)

- Head north to meet Grandpa and join the Twins
- Find 15 baseballs (20 energy for 3 balls) in the nearby field(s) past the blocking boulder

- Repair the Game Booth in 3 stages: 1st=4 saws, 2 hammers, 4 trowels; 2nd=1 stool, 2 tiles, 1 chain; 3rd=15 baseballs
- Repair the Pumpkin House in 3 stages: 1st=2 hammers, 4 saws, 3 trowels; 2nd=3 mortar, 3 pipes, 4 tiles; 3rd=2 Pumpkin Stands (20 energy each), 6 scissors (no cost) (the stands and scissors are found in the nearby area)
- Find Greta by going north and removing the blocking boulder
- Remove the west blocking boulder and clean up the area of 5 piles of debris from the exploded oven (4 x 2 energy each)
- Collect 4 packs of Pumpkin Seeds (15 energy per pack) and grow 4 Butternut Squash (10 minutes each) in the Pumpkin House (yes, pumpkin seeds normally would not grow into butternut squash, but then this is a magical land…)

- Repair Greta’s oven in 3 stages: 1st=4 saws, 2 hammers, 4 trowels; 2nd=2 saws, 2 cement, 1 pipe; 3rd=4 Butternut Squash, 3 bricks, 4 screws
- Remove the blocking boulder in the fields west-southwest of the oven, and cut down 9 Pecan Trees (32 energy each for 4 pecans) to gather 36 Pecans
- Make 6 Pecan Pies (10 minutes each) in the oven using 6 pecans, 10 wheat, and 2 water each
- Set up the Pie Table in 3 stages: 1st=2 pies, 4 saws, 2 hammers; 2nd=2 pies, 4 pipes, 3 beams; 3rd=2 pies, 2 butternut squash (from the Pumpkin House), 5 dough
- Remove the blocking boulder to the west of the pie table, follow the path to the northwest, and then southwest to the Hedge Maze; meet Grandpa and then follow the signs to the northeast on a Secret Mission and remove the blocking boulder
- Find Grandpa’s secret garden to the north, removing the boulder along the way (you can tap on the random giant vegetables for rewards)
- Grandpa wants a growth serum for his giant vegetables; start gathering the ingredients: 18 Thimble Bush Sap portions (15 energy each)
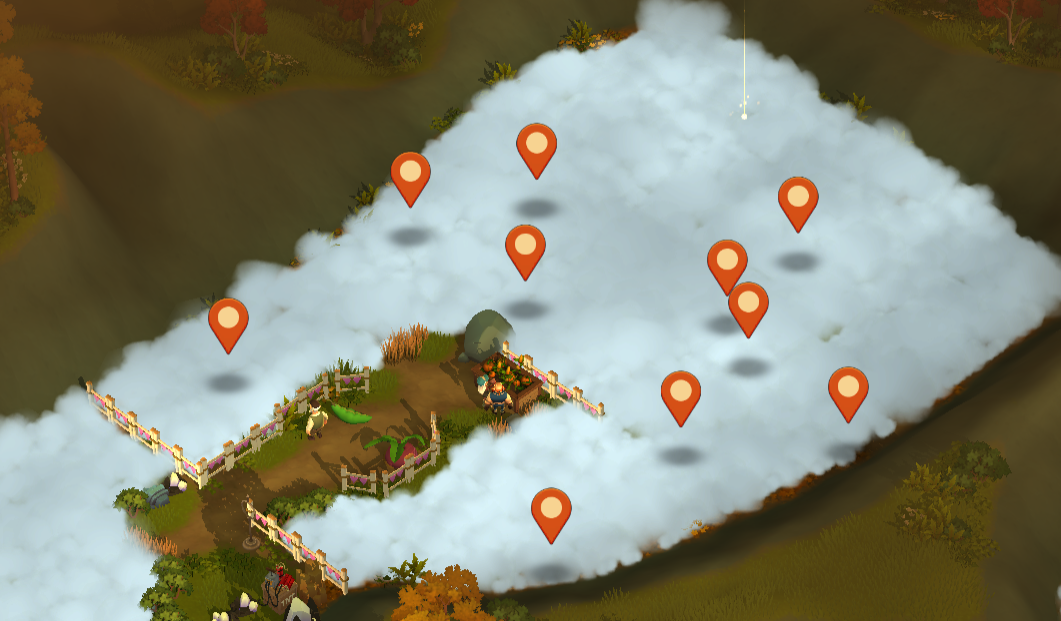
- Find Grandpa’s workbench and repair it in 2 stages: 1st=4 plywood, 2 hammers; 2nd=2 planks, 3 screws
- Make 6 growth serums using 3 portions of Thimble Bush Sap and 1 water each (10 minutes each)
- Infuse the Giant Pea Pod in 3 stages: 1st =1 serum, 4 saws, 2 hammers; 2nd=2 serums, 2 bricks, 4 pipes; 3rd=3 serums, 6 water, 2 screws
- Remove the eastern boulder and find the Parade Float
- Find 3 Pennant Banners (15 energy) and 3 String Lights (15 energy)
- Find Tom the Turkey (east of the Parade Float)
- Collect 6 Dried Corn Kernels (10 energy for 2 kernels) from 3 corn plants in the northern area (there are more plants in the southeast but you can’t reach them yet), and also grow 5 more Butternut Squash in the Pumpkin House

- Finish building the float in 2 stages: 1st=3 Pennant Banners, 3 String Lights, 3 saws; 2nd=6 Corn Kernels, 5 Butternut Squash
- Follow the Twins south and then west to the broken Merry-Go-Round
- Find the 3 scattered Generator Parts (20 energy each) and the 5 Gears (10 energy)
- Repair the Generator in 3 stages: 1st=4 saws, 2 hammers, 4 trowels; 2nd=1 pipe, 3 cement, 3 beams; 3rd=5 Gears, 3 Generator Parts, 1 chain
- Find and collect 9 red cables (10 energy each) far to the east of the Merry-Go-Round
- Connect the cables between the generator and the Merry-Go-Round by rotating the cables; each rotation requires 10 energy, with a total of 11 rotations needed
- Follow the Twins into the last large unexplored area to the southeast past the boulder to the cotton candy stand and picnic table
- Discover the popcorn stand, find the 28 needed Corn Kernels beyond the eastern boulder (10 energy for 2 kernels), and then make 7 Popcorn (4 kernels per bag of popcorn, 5 minutes each)
- Find 14 Candy Sugar to the south of the popcorn stand beyond the boulder (10 energy for 2 Candy Sugar), and then make 7 Cotton Candy (2 sugar and 1 twigs for each)
- Set up the picnic table in 3 stages: 1st=4 saws, 2 hammers. 4 trowels; 2nd=7 Popcorn, 5 Butternut Squash (from the Pumpkin House), 4 buttermilk; 3rd=7 Cotton Candy, 5 more Butternut Squash, 2 regular sugar
This completes the main quest sequence for the Autumn Fair.
If you have remaining time you can continue playing the remaining 4 quests (Fair Tokens, Cornucopia, Turkey Feathers, and Butternut Squash) and the 6 additional tasks (Water Dried Veggies, Wreath Stands, Fixing Fences, Deflated Balloons, Finding Sheep, and Fixing Hedge Maze).
Back to top of Area Quests List
Koi Garden (TSM #8)
![]()
Note: You may see many big yellow arrows pointing at items that require repair; suggest that until you have completed the main quests that you just ignore the flair poles, green statues, and platforms (since they use up repair materials that you’ll need first)
Note: This area uses a lot of bricks (minimum of 37); suggest start making them early and then continuously during your explorations
- Move north through the archway to the Koi Pond

- Head west along the path, remove the blocking boulder, and then find 6 Zen Stones (15 energy each) to the south

- Place the stones in the circle and then move them into a “Zen” pattern: 10 energy per move, total of 14 moves
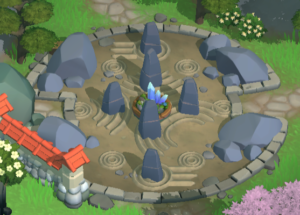
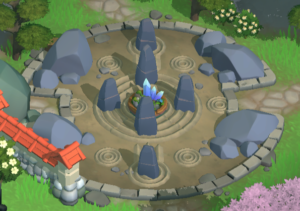
- Build the Workbench in 2 stages: 1st=3 twigs, 3 stones, 3 grass; 2nd=3 hardwood, 1 screw
- Create many Eco Varnish on the Workbench (6 minutes each) using Amber from bushes
- Repair the Broken Bridge to the south in 3 stages: 1st=3 stones, 3 gravel; 2nd=2 plywood, 3 bricks, 3 trowels; 3rd=2 Eco Varnish, 3 glue, 3 pipes
- Cross the bridge and find 6 Well-Balanced Stones (24 energy per 2 stones), and repair the 3 Stone Sculptures in the south using 2 Stones and 1 Eco Varnish for each
- Discover the 4 Jasmine Beds to the southwest beyond the Zen Stone Garden’s western boulder


- Collect 8 Coffee Beans from 4 nearby bushes (20 energy per bush, 2 beans per bush)
- Make 4 Fertilizer on the Workbench (2 Beans and 1 fire each, 10 minutes) and fertilize the Jasmine Beds
- Go north beyond the boulder and find the shepherd, then continue northwest to the Sheep House and repair it in 3 stages:1st=3 glue, 3 gravel; 2nd=3 pipes, 3 glue, 3 bricks; 3rd=3 water, 4 bricks, 3 plywood
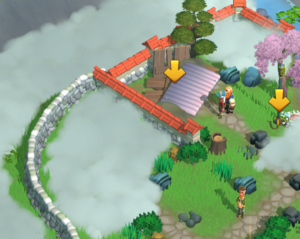
- Move east across the bridge, remove the boulder, and find the single wayward sheep
- Find the oven and repair it in 2 stages: 1st=3 gravel, 3 glue, 3 pipes; 2nd=3 waffles, 3 bricks, 3 stones
- Make a cup of Jasmine Tea using 5 blossoms from the Jasmine Beds; note: you can make more Tea and gain energy from the oven

- Remove the eastern and southeastern boulders on the other side of the bridge and head southeast to collect 4 Water Lily Seeds bags (15 energy each)
- Clean up the 2 Water Lily Pots (15 +10 + 5 energy each), and then plant the seeds in the pots using 2 Seeds, 3 glue, and 4 bricks for each pot
- Head west across the water stepping stones to the far blocking boulder, remove it, and build the Birdhouse in 3 stages: 1st=3 gravel, 3 glue, 3 pipes; 2nd=3 stools, 3 gravel, 4 glass; 3rd=3 Eco Varnish, 3 water
- Build the Koi Gazebo in 2 stages: 1st=2 glue, 3 glass; 2nd=2 Eco Varnish
- Head north on the right side of the Birdhouse, remove the boulder, and collect 3 gobs of worms (10 points each), then tap on the Heron and feed him the worms
- Collect 1 bag of bright green Fertilizer and then fertilize one of the small, round flower gardens in 2 stages: 1st=1 fertilizer; 2nd=1 Eco Varnish, 3 bricks
- Head to the far north, remove the blocking boulder, and find the Heron’s Mate
- Find 4 more worms and feed them to the Baby Koi in the pond
- Pick up the Baby Koi using a spinner (100 points needed, 10 energy per spin)
- Go back to the center of the area, remove the boulder, and go north to find the Koi Parents but first you’re needed to repair the north pond in 3 stages: 1st=3 pipes, 3 glass; 2nd=3 bricks, 3 gravel, 3 glue; 3rd=2 Eco Varnish
- Restore 1 Stone Lamp near the north Pond in 3 stages: 1st=3 gravel, 3 pipes; 2nd=4 bricks, 3 gravel; 3rd=1 Eco Varnish
- Go past the boulder to the west and collect 2 gear Parts (15 energy each) and 18 Herbs (16 energy for 2)
- Create 3 Sanitizer Potions on the workbench using 6 Herbs and 1 water for each
- Build the Water Sanitizer in 3 stages: 1st=3 pipes, 3 bricks, 3 glue; 2nd=2 Eco Varnish, 2 Parts; 3rd=3 Sanitizer
- Repair the Pretty Red bridge north of the Sheep House in 3 stages: 1st=3 stones, 3 gravel; 2nd=2 plywood, 3 bricks, 3 trowels; 3rd=2 Eco Varnish, 3 glue, 3 pipes
- Cross the bridge, remove the boulder, and find the 3 colorful, lucky koi (Golden, Lipstick and Silver) in their small ponds; tap on the ponds and collect the fish using spinners (100 points, 10 energy per spin)
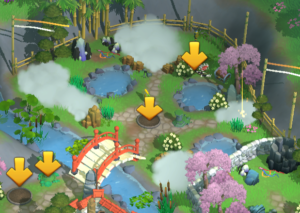
- Put the 3 koi in the newly-cleaned pond by the Water Sanitizer
- Head north, remove the boulder and enter the last, fish-shaped unexplored area

- Remove 2 Thorny Vines (15 energy each) and 2 portions of Moss (15 energy each)
- Collect 4 more worms (10 energy each from the western area just north of the long orange fence) and feed them to the Koi Parents
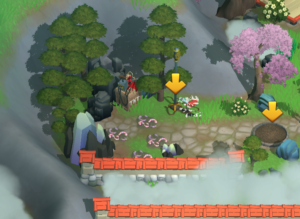
- Collect the Koi Parents using a spinner (100 points, 10 energy per spin)
- Repair the Koi Family Pond in 3 stages: 1st=3 glue, 3 pipes, 2 Water Lilies; 2nd=1 Koi Babies; 3rd=1 Koi Parents
This completes the main quest sequence for the Koi Garden.
If you have remaining time you can continue playing the remaining 4 quests:
Find the other 4 sheep
Repair the Big Koi Flairs
Repair the Water Lily statues
Repair the Temple Garden platforms